Photo Corners headlinesarchivemikepasini.com
![]()
A S C R A P B O O K O F S O L U T I O N S F O R T H E P H O T O G R A P H E R
![]()
Reviews of photography products that enhance the enjoyment of taking pictures. Published frequently but irregularly.
How Not To Create A Conditional Action


14 December 2012
Our expertise has been finely honed over the years. We're now capable of screwing anything up on the first try. Wasn't always that way. But as a reviewer, you have to adapt. And we have.
We like writing code like some people like playing World of Warcraft. So when Adobe dropped an If statement into Photoshop CS6 v13.1, we had to try it.
Photoshop is scriptable, so we can't really complain that the company only dropped an If statement (and not a few more tools) in the latest version available to Creative Cloud subscribers. But forgive us for hoping this could be the beginning of something big. Or bigger, at least.
The concept is pretty simple.
If a certain condition is true, run this Action, but if it isn't, run this other Action. You can run no Action at all for either situation, too.
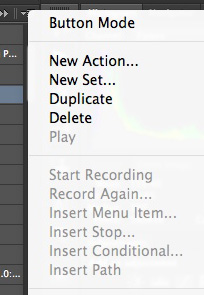
Grayed Out. Start with a New Action.
FIRST GOOF
With the Action panel open (use the Window menu item to enable it), you'll see that the Insert Conditional option is grayed out. Not a good start.
Well, that's because you have to "insert" the conditional statement in an Action. So start by creating a New Action and right after you hit Record to start creating the Action, you'll see that Insert Conditional is now live.
Clicking on Insert Conditional as you record, brings up the dialog box with the three If statement options.
It's a pretty restricted set of options, though.
The first restriction is the condition itself. You pick from a pop-up menu whether your document is landscape or square or RGB, CMYK, sRGB, 8 bit, 16 bit, 32 bit, has unsaved changes, a selection, layers, alpha channels, is open; or the Layer is the background, a pixel layer, an adjustment layer, a shape layer, a layer group, is locked, visible, has a pixel mask, vector mask or effects.
But the second restriction caused us to abandon our first Conditional immediately. The only Actions you can pick are ones in the current set. So if you have a Default set of Actions and another for Sharpening and another for Resizing, say, you'll have to reorganize your Actions to make all of them available to a Conditional.
SECOND GOOF
We started a New Action, making sure we were addressed to the Set that had the two Actions we wanted to use and then plugged in the values.
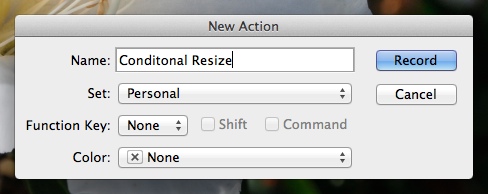
New Action. That's the trick to getting started.
Here's the scheme of things:
- If: the image is landscape
- Then: run the Action that resizes it to 400 pixels wide
- Else: run the Action that resizes it to 250 pixels wide
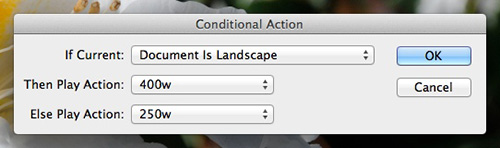
Fill Out The Form. Your options are restricted.
Except we forgot we were recording, so we blithely went on to open an image, recording that in the Conditional Action, too. We we finally stopped recording (you can Insert Stop from the Action menu), we were able to delete that command and actually run our new Action on a landscape image.
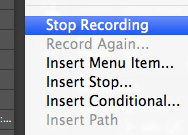
Stop. Don't forget.
SUCCESS
And it worked!
So naturally we wanted to see if it worked with a portrait image. And we didn't want to open one. We just wanted to rotate the one we had open. But we wanted to rotate the full size image.
You can't Undo an Action but you can Step Backwards. Since we're resizing, we also apply a little sharpening, so we had a couple of backward steps to undo before we could Rotate the image.
Hey, that worked too!
One thing we noticed is that the Conditional Action ran a lot faster the second and third times we tried it. That's good news for batch processing.
Another thing we noticed was that Photoshop doesn't prevent you from using the same Action name twice. So beware.
And have a ball, too!