Photo Corners headlinesarchivemikepasini.com
![]()
A S C R A P B O O K O F S O L U T I O N S F O R T H E P H O T O G R A P H E R
![]()
Reviews of photography products that enhance the enjoyment of taking pictures. Published frequently but irregularly.
Video Editing: Prep


9 August 2013
The DVD is sitting in a jewel case by the HDTV as we sit down to describe what it was like to edit 107 video clips, 113 stills and two long audio files into a one-hour and seven-minute movie of our recent wedding video project. Which suggests that it can be done.
R E S O U R C E S
Looking back at the process now, though, we're reminded of the early days of desktop publishing in which any secretary could suddenly be anointed the company graphic designer.
Someone who might have known the difference between pica and elite in a typewriter was now in charge of a dozen fonts in four styles each. And it didn't usually work out very well.
Successful video editing requires a wide range of skills. As a photographer, you may have a head start on the visual skills required. But what about sound? How well-tuned is your ear? And how well can you tell a story in video clips?
Some of these skills can be learned. Some you simply may not have the aptitude for. That's why there are so many people involved in any film crew, after all.
But just like desktop publishing, video editing is about a lot more than the software. As we are about to demonstrate in this series of articles.
PROFESSIONAL ADVICE | Back to Contents
We know a few professional video editors (none of whom owed us any favors, unfortunately), so we thought it would be prudent to ask one of them for advice before we got rolling on this project.
Joe gave us some practical advice before trying to scare us:
I would have to recommend judicial use of the L cut! Build suspense, hide edits, play with expectations and emotions, all by extending the audio beneath underneath the video.
I remember one weird little trick, if you are cutting between two different shots of the same thing. Tack three extra frames on to the beginning of the second shot, so that at frame-by-frame speed you see the overlap in action. At normal speed it actually flows better!
Lastly, I'd recommend thinking about where your shots guide the eye, and endeavor to keep that focus moving around as fluidly as possible (no sudden jumps from the right side of the frame to the left, for example). Unless you're going for a horror flick.
It just occurred to me that you are wholly responsible for the couple's impression of their wedding day. No personal memory stands a chance against a crafted narrative set in digital stone. Good luck!
There are two threads in that advice that continually played themselves out in our editing adventure.
The first is the technical aspects of knowing how to do things like splicing two shots together in a jump cut. The other is knowing what things to do like when to use a jump cut and when to use a cross dissolve. And recognizing when you're not being judicious about the use of L-cuts.
The second is a bit more demanding.
Even if you don't know what a jump cut, cross dissolve or L-cut is, you've seen them millions of times. You're familiar with them. And learning how to do one is as simple, really, as googling for an online video that shows you.
But when to do what and why is another subject. And how to fix a problem like 30 seconds of blank wall as the emcee tries to build up suspense before an introduction requires 1) recognition of the problem and 2) some idea of your options.
So when you ask yourself if you -- either as an amateur or a still photographer considering video -- can do this, you're asking two questions.
With the DVD in its case, we can tell you the answer to the first one is, "Yes." You can pretty painlessly learn your way around video editing software and produce a movie from your cuts.
And we can also warn you that the answer to the second is just, "Maybe." That movie may not be any good, after all. It may put everyone to sleep after the first 10 minutes. Just as that newsletter designed and typeset by the company secretary turned out to be unreadable.
Software is just a tool, after all, which can be used intelligently -- or not.
THE FIRST STEP | Back to Contents
With the problem put in perspective, where do you begin?
We were continually thankful that we began the way we did, inspired by those cooking shows where all the ingredients are measured out into little cups and plates beforehand so the chef just has to pick one up, tell you what it is and drop it in the pot.
It's called prep. And the more you do of it, the easier time you'll have.
You may feel so rushed that you don't have time for it. You roll up your sleeves, you toss things into the pot. But, after cooking it a while (and a while longer), you realize you have to toss it all out because it's inedible.
Prep is inevitable, even if you're in a rush. Whether you realize it or not, the first thing you do will be prep. Might as well do it efficiently.
EVALUATING SOURCES | Back to Contents
The first prep task is to collect your source material.
We had more source material than we knew what to do with. Two long audio files, 113 stills and 107 video clips from two cameras. We also had access to some other stills shot at the wedding.
And while you might not think to include it with the rest of your sources, the couple's wedding site can hold a few solutions, too.
The more source material we collected, the more insurance we had. If we missed anything or had any unusable footage in the middle of a take, we had other material to cover the gap. A still we could pan or a clip from other video. In assembling the final movie, we were often grateful we had taken so much footage and snapped so many stills.
But these sources don't always play nice together.
Our video was in two formats: 720x480 from the Sony DCR-SR88 and 1280x720 from the Olympus E-PL1. And the pixel aspect ratio didn't match either, which created problems of its own that we'll discuss later.
The practical consequence of this was that we were limited to the Sony resolution. The Olympus clips would have to be resized down to match. Otherwise the smaller Sony clips would play in a black border, which would be a little too funereal for a wedding video.
You might think we took some time to resize the Olympus clips as part of prep. But no, we didn't.
You have to know what not to prep.
WHAT NOT TO PREP | Back to Contents
Coming from a still background, you might be tempted to polish your audio tracks and video clips before you ever actually use them in the production. You see familiar tools like Auto Levels and Curves to adjust exposure and others to stabilize the video, normalize the audio, etc. It's natural to preen before the performance.
Forget it.
One reason to forget it is that you won't use everything. So only the stuff the audience sees has to be polished.
The other reason is that it's a lot easier to polish everything from the finished cut. You give a handful of commands instead of repeating a handful of commands a few couple dozen times.
So all that can be postponed. Which is, itself, an enormous relief.
STILLS | Back to Contents
Stills are another subject. High resolution digital images can take a lot of resources to render frame by frame so the conventional wisdom is to resize them in your image editing software before using them in your video project.
The one catch to that is that a resized image won't allow you to pan and zoom the stills. And you won't really know if you want to do that until you're in the heat of the battle.
Fortunately it's not a big deal to switch to an image editor to resize an image on demand. It's quick to import the image you've resized so it's large enough to be panned and zoomed. So we postponed that task too.
OUTPUT | Back to Contents
You can think of the movie you assemble in your video editing software as output agnostic. You satisfy the output requirements of any medium when you export the movie. Which is the last thing you do.
As with stills, you can always decrease resolution but it isn't very bright to ever increase it.
We planned to deliver the movie on a DVD. So the 720x480 Sony resolution was fine for that.
If later we decided to make other cuts of the finished production, it would just require another export of the finished production from the editing software targeting the new output device.
SELECTING SOFTWARE | Back to Contents
We had at our disposal a wealth of software options to make the movie.
We've used Fotomagico to make slide shows of stills, adding a sound track. And we like the interface very much. But while a still is a finished piece, our movie would need some work -- and not just setting In and Out points. It would need stabilization, exposure correction, color matching and some special effects help, too.
So we really needed a tool designed to work with video.
Premiere Pro CC. The least objectionable and most accommodating option we had.
On that front we had iMovie, Premiere Elements and Premiere Pro CC. They all shared one imposing feature: we didn't really know how to use any of them.
Just a few days before we left for the wedding, we made a short DVD production from some old TV footage converted from a VCR recording. That needed some help with color correction and setting In and Out points. We managed the project in Premiere Elements but it wasn't fun. The interface seemed to hide things in plain sight.
We felt much the same way about iMovie. That the simplicity would stymie us. We might be wrong about that, but we knew we'd rather be wrong than find out we were right with most of the project done and the last few hurdles too high to clear. We have had trouble importing various video formats into iMovie, come to think of it.
So we went with Premiere Pro CC to make our movie on the theory it would have the least objections to our multiple formats and the most solutions to their numerous short-comings.
And while we were indeed able to get the movie made with Premiere, we couldn't get the DVD made with it. You just can't get from Premiere to iDVD. Fortunately, iMovie came to the rescue for that, even letting us add custom chapter markers. More about that later, too.
PREMIERE & THE CLOUD | Back to Contents
Premiere isn't just one application. It's really an ecosystem.
In Premiere you assemble your clips into sequences that you can combine into your final movie, making it easy to work on the project in pieces. Premiere can also host some impressive third-party tools like Digital Film Tools' Film Stocks.
But to refine your audio, you might work on it in Audition CC. And to evaluate and match color between different clips, you might rely on SpeedGrade CC. And to stabilize footage, you might dynamically link to a clip edited in After Effects CC. Which are optimized to work together (so you usually don't have to render and export a clip, for example, before using it in another tool).
The Premiere Ecosystem. No additional charge.
And when you export your finished movie, you're actually tapping into Adobe Media Encoder.
As we worked with these tools, we were happy to discover that some of their most powerful features were integrated in Premiere CC. We could, for example, stabilize a clip in Premiere just as well as in After Effects or change the color lookup table of a clip using the same Lumetri engine as SpeedGrade uses.
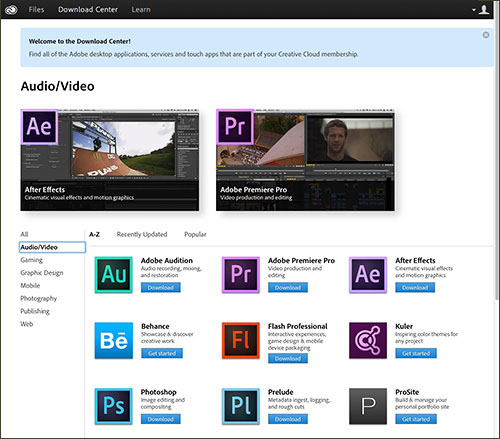
We were, however, free to use any of these tools with a Creative Cloud subscription. All we had to do was download the application. Same price.
That's an incredibly liberating feeling for any creative. You can grab the tools you need without any authorization from the chief financial officer.
But the Cloud has other advantages besides making professional software available.
LEARNING THE TOOLS | Back to Contents
Downloading the applications and knowing how to use them are, of course, not the same thing. We gave ourselves plenty of time to play around with them to get some idea of how things work. Take as long as you need, we said.
The Web, including the Creative Cloud, has a wealth of information on each of these tools and on the processes themselves you'll have to master to do this stuff well. We found resources from Adobe, Lynda.com, video2brain and others that showed us how pros use the tools to put together a production.
Pros, it turns out, don't work too hard. They work smart. Emulate them.

Adobe Tutorials. Concise but thorough demonstrations of how to get the job done.
We'll list our favorite links in the Resources section of each part of this series but here we want to discuss the strategy of getting from zero to 60 in the most efficient way possible.
Our first source for tutorials were the Adobe TV tutorials. The list for Premiere also has links (on the right) to After Effects, SpeedGrade and Audition. A popup details each tutorial so you know what you're getting. Durations are also posted so you know how long it will take to watch the tutorial. Great place to start.
But the tutorials on the Creative Cloud go a little deeper. The Getting Started tutorial by Rich Harrington uses six videos taking 35:48 to show you how to assemble a video about bald eagles. We found that very helpful in understanding how to play the game Premiere's way.
As we watched the tutorials, we had questions, some pertaining to our production and some more generic. Like what's nesting? Or how do you do a picture-in-picture effect?
The tutorials cover that stuff but a Google search gave us a variety of answers from different sources, among which our favorite was Jeff Sengstack. Seeing more than one person do something, though, never hurt.
This is a far cry from the days of hefty tomes and HTML documentation. But it works very well. If you know what you're looking for, you can find it instantly and review it until you've got it down pat.
We have a half shelf worth of video editing titles that we simply didn't find helpful. We scanned them for advice, tips and techniques but came away feeling we'd gotten the young adult version of the script. Except for Lloyd Kaufman's Make Your Own Damn Movie!, which never failed to amuse us, even if we didn't learn anything from it.
There is a 455-page PDF reference manual for Premiere Pro. And we did read it to grout the tiles of the video tutorials. But it wasn't our primary source for solutions. It did, however, include links to video tutorials to illustrate concepts in each section.
From Premiere itself you can print a list of keyboard shortcuts, which is pretty handy. You tend to do things hundreds of times in Premiere. Having a keystroke for it makes a difference.
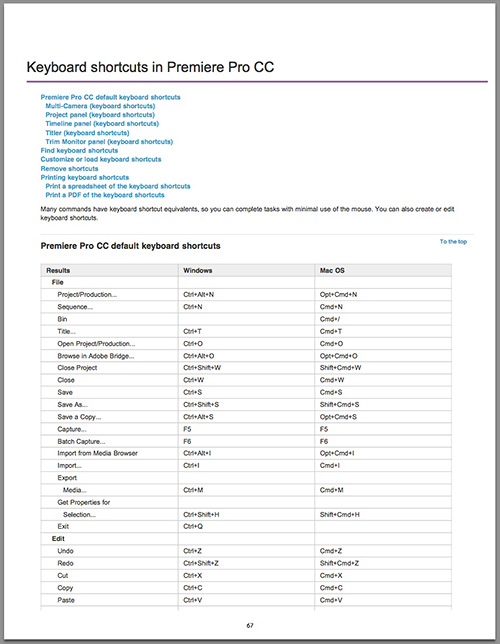
Keyboard Shortcuts. Oh, about 10 pages of them in the PDF manual but you can print a list from Premiere itself.
As it happened, throughout the process we relied on our video tutorial approach. From combining different video resolutions in the same clip to setting up chapter markers that iDVD would recognize, we googled solutions that were video tutorials showing us what to do.
The only downside to this approach is that you don't always retain the details of the more intricate solutions. More than once, taking a week between similar tasks, we had to wonder how we'd done that before. But the answer was just a Web search away again.
A FEW TERMS | Back to Contents
It helps to learn the lingo, too.
One of the hardest walls you bang your head against in any new activity is learning new words for new things. Terminology. Sometimes it's arbitrary, but it's always worth the trouble to learn the lingo. It will at least make your questions more intelligent. And your searches more productive.
Before we did any actual work on our video, we had to learn how Premiere works. After a tutorial or two, we got the lay of the land. Which is:
Your production will appear in Premiere as a project that contains copies of all your original material and uses pointers to those copies to build the video production you assemble from them. That production is made of sequences of clips you assemble on a chronological timeline that is composed of video tracks and audio tracks with various in and out points indicating what part of the track to actually use in the sequence.
Your source material is what your camera and/or microphone captured. You point Premiere to that and Premiere copies it into folders or bins. You can move source material from one bin to another (like one named Processed Clips) to keep track of what you've done. It's pretty efficient.
Each track has a (sometimes invisible) graph. And sometimes more than one. The graph can be adjusted with keyframes, small points that represent a point in the clip where an adjustment begins. The volume of an audio track, for example, can be adjusted by adding a keyframe to mark where the change starts and then adding another that is dragged down to lower the volume or up to increase the volume. The slope between the two keyframes represents how low the change takes.
Clicking anywhere on the complex Premiere interface can be dangerous. And confusing. To add a keyframe, for example, you have to use a modifier (Command/Control). So be careful.
One nice feature of the interface is that by tapping the tilde key (~), you can take a pane of the interface full screen or shrink it back to its corner of the interface. So you never feel squeezed as you assemble and organize your source material.
The multi-panel interface is consistent across video/audio applications. And not unfamiliar if you've used other Adobe products. You'll already know about workspaces and how to resize panels. They're almost fluid as they respond to your focus of attention.
SOME PREFERENCES | Back to Contents
There were a few things we wished we had been told right off the bat.
Still Image Default Duration puzzled us. But you can set how long a still is shown as a general preference. The default is 150 frames or about five seconds at 30 frames per second.
You may not be able to actually see that on the timeline if you've strung together a lot of clips and are viewing the whole timeframe, so zoom in.
And how do you mix two different frame sizes? A preference handles that: Default scale to frame size. By default, it's off. We wanted it on.
And what's the frame size? Well, you have a wealth of options when you create a sequence. The trick for us was to use the Sony frame size (there are automatic ways to do that) and let Premiere scale the Olympus clips to it.
But the Olympus stuff was all handheld so we had to stabilize it and the stabilizer filter doesn't work on video that has been scaled to the frame size. The simple fix is to unscale it (there's a contextual menu option to unclick) and stabilize it at the frame size in After Effects.
Then the matter of using a modifier key to click on the graphs in the timeline or using the Effects tab in the Source panel (where you can see all the graphs at the same time) was a revelation, too.
So there were a few details we would have been happy to discover earlier. The rule is that if anything seems onerous, you're doing it the wrong way. Pop over to your Web browser and look the topic up for the right way to do it.
OFFLINE EDITING | Back to Contents
In the PDF manual, Adobe notes that most modern computers can handle the data rate of digital video in full resolution but that High Definition footage can be a bit too demanding.
The solution for that in Premiere is offline editing in which you make low-resolution copies of your HD clips in Adobe Media Encoder to use in editing. Those are replaced with the original, high-resolution footage when you render and export the finished production.
Our system was able to handle the original HD clips, so we didn't bother to create low-resolution copies. But it's worth testing before you spend a lot of time waiting for things to happen.
We didn't realize at first, but Premiere itself created previews of the clips that were a slightly lower resolution than the export. We were a bit disappointed in the lack of detail until we saw some exports on our HDTV. They looked a lot better than what we had been editing.
A TEST PROJECT | Back to Contents
We fooled around a bit in Premiere just to get the feel for things. Better to get a few mistakes out of the way when they don't count. And to try things when failure wouldn't be catastrophic.
When we felt comfortable creating a project and making sequences we could export that would play on our HDTVs, we were ready to work on our real project and import our source files. We had successfully conducted a complete walk-through.
That's really the last bit of prep you have to do.
NEXT | Back to Contents
As we continue this series, we'll describe organizing our source material, putting together the rough cut, outlining the movie itself, our workflow in building sequences and how to do things like titles and chapter markers. Along the way, we'll publish links to the tutorials we found most helpful in the table of contents of each article.
You can, as we said, do this. It isn't trivial but it can be a lot of fun.
(Editor's Note: This is the first of a five-part series on editing a wedding video. Links to the other stories are in the main table of contents at the top right of each story.)