Photo Corners headlinesarchivemikepasini.com
![]()
A S C R A P B O O K O F S O L U T I O N S F O R T H E P H O T O G R A P H E R
![]()
Reviews of photography products that enhance the enjoyment of taking pictures. Published frequently but irregularly.
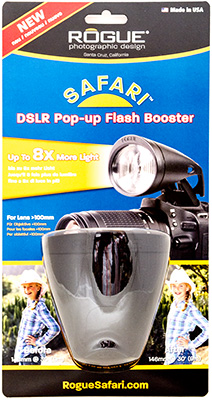
Rogue Safari Spotlights Your Subject


28 October 2013
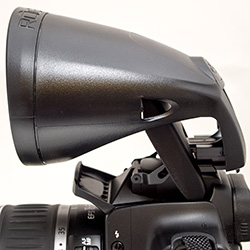
Rogue Safari. Instructions and spacers inside.
The Safari dSLR pop-up flash booster from Rogue Photographic Design in Santa Cruz is a clever solution to the problem of casting a weak pop-up flash a few feet further. And make no mistake, it does work. Rogue claims a three-stop or 800 percent increase in distance that works out to about 70 feet away.
We tried a model designed to be compatible with both Canon APS-C and Nikon DX dSLRs. And we tried it on both such cameras, getting good results on both of them.
Rogue does not recommend the Safari for full-frame cameras. See Rogue's compatibility chart for compatible and incompatible cameras.
DESIGN
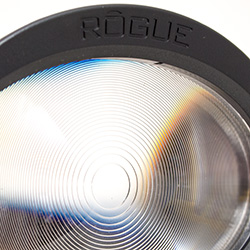
| Back to ContentsThe $34.95 Safari is a black polycarbonate conical housing that holds an elliptical fresnel lens in front of your pop-up flash. At the narrow end of the cone, a plastic hot shoe mount is designed to slip into the camera's hot shoe with the pop-up flash in the closed position. It weighs just two ounces.
Two hot shoe extenders are included in the package to raise the Safari 5mm or 8mm higher, if you need it. We needed it on the Canon Rebel we used but not on the Nikon D300.
It was not easy getting the extender off either camera. We pushed and pulled until it finally released. But we weren't afraid of breaking the Safari as we did so.
MOUNTING | Back to Contents
We did have a hard time getting the plastic mount to fit the Nikon hot shoe, though. A simple firm push was required for the Canon Rebel but the Nikon cried out for a little whittling. Rogue realizes it's a tight fit but the spring-fit mount is also designed to be self-whittling, making an easier fit after a few uses.
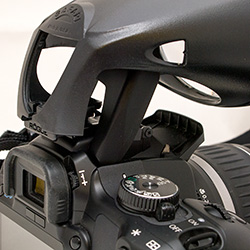

To mount the Safari in the hot shoe, you push forward and down with your thumbs on the back support of the Safari. But first make sure the popup flash is down.
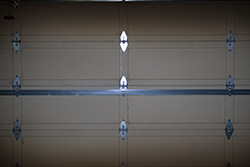
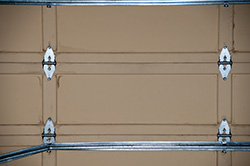
You'll know if you need an extender (or spacer as Rogue calls them) when you take a shot. If the oval light pattern of the flash is too low (as in our "Canon" shot below), add one. The "Spacers" shot shows them upside down so you can see the latch.
SHOOTING | Back to Contents
While we liked the black housing that doesn't let much light escape through anything but the fresnel lens, we were concerned about the flash overheating. But the Safari is vented on both sides and the back and it's pretty roomy around the popup flash.
Rogue offers three recommendations:
- Use at least a 100m focal length
- Use a TTL or Manual flash mode
- Use Program, Shutter Priority or Manual exposure mode
Let's look at these a bit more closely.
FOCAL LENGTH | Back to Contents
The Safari doesn't boost the built-in flash's guide number. It has no more power than it ever did. What the Safari does is focus the light.
Tests. 'Canon' shows coverage without spacer, 'Spaced' with correct spacer, '100mm' at that focal length, all just beyond 20 feet.
So while the manufacturer may have designed the flash lens to cover at 18mm, you're wasting a lot of light when you get to telephoto focal lengths. The Safari refocuses the light in a narrower beam to throw it further.
That's why Rogue recommends using a focal length of 100mm or longer.
And in our laboratory tests (when the car was out of the "laboratory"), we got very nice coverage around 100mm and very nice, say, in-camera "vignetting" short of that. But we prefer to do our vignetting in post production.
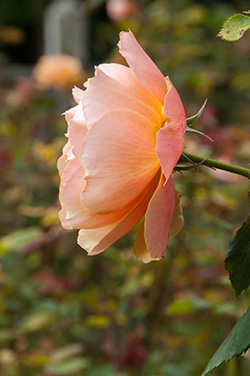
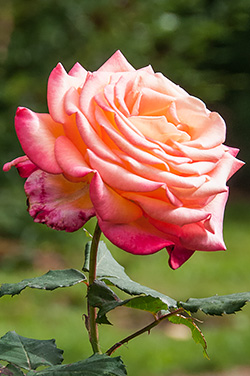
On the other hand, if you're using the Safari as a daylight fill, the focal length restriction is officially lifted. It's 100mm for full coverage but it all you want to do is add some distant fill on an isolated subject (like our rose shots below), you can shoot at a shorter focal length.
FLASH EXPOSURE | Back to Contents
We used TTL or through-the-lens flash mode on both cameras. That lets the camera meter the flash for the correct exposure. And it worked fine. If we had had a tricky subject, we could have resorted to Manual mode or to flash exposure compensation, but it wasn't necessary for our test shots.
Rogue suggests Canon users set flash metering to Average instead of Evaluative when using E-TTL II.
EXPOSURE MODE | Back to Contents
The choice of exposure mode is really about making sure the shutter sync speed isn't exceeded. If it is, one side of your image will appear dark.
Manual mode and Shutter Priority both require you to select the shutter speed. Check your camera manual for the fastest sync speed the camera supports and don't exceed it.
In Program mode, with the flash active, the camera should limit the shutter speed to the sync speed and adjust aperture and optionally ISO to handle the situation. But check.
REMOVAL | Back to Contents
To remove the Safari from your camera, first pop the flash back down. Then rock the unit side to side until it slips out of the hot shoe.
SHOOTING | Back to Contents
We went on a little safari with the Safari on an overcast day in Golden Gate Park. We were looking for the new Fairy Door, which is hidden somewhere behind the Japanese Tea Garden.
It didn't take long to find it, although most people passing by had no idea it was there. You have to know to look.
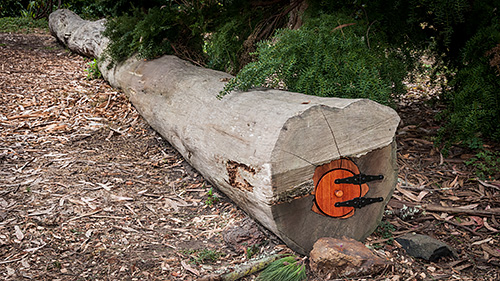
Fairy Door. Fill flash at 36mm to light up the dark end of the log.
We shot it without flash, then with TTL metering and then with 25 percent fill. The flash shots were warmer than the gray daylight shots.
The Safari did light up the end of the log where the door was, just as we hoped. And there was no vignetting in TTL mode or with Manual fill. We preferred Manual fill because it let us add just a little flash to lighten the shadows.
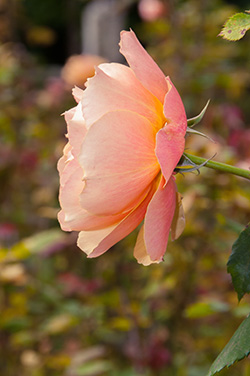
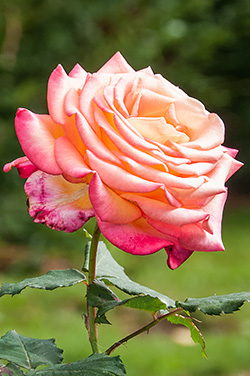
We used it in the Rose Garden, too. Again, Manual fill delivered pleasing results, lightening the shadows on the full blooms that stood out against the evergreen backgrounds. It didn't matter that the flash had been narrowed by the Safari because there was nothing but a rose to illuminate.
And we were illuminating it from a good distance away, too. Our crops are 100mm to 135mm focal lengths.
A GALLERY | Back to Contents
Here are just a few shots we took using the Safari. The roses are crops of the full size images. The others are full crops.
Both rose shots were taken a f11, 1/250 second and ISO 400 at 112mm.
The Grass show was taken at f11, 1/60 second, ISO 1250 at 38mm. And the Trees shot was taken at f11, 1/60 second, ISO 1600 at 44mm.
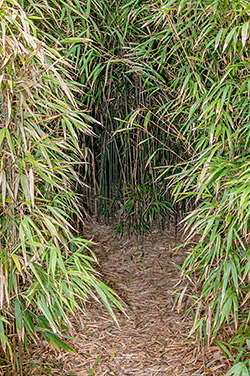
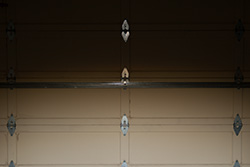
Splendor in the Grass. This was a dark hole before we fired into it.
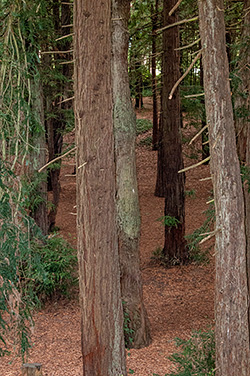
Into the Woods. Surprisingly well lit scene.
The Safari produced a warmer image than the non-flash images (we've minimized it in post processing). But what intrigued us was how far we were able to throw a fill light with the built-in flash. The only subject in range of the built-in flash was the grass. You can see the left side of the image is more exposed because the flash was on that side.
IDEAS | Back to Contents
Besides a white shower cap, this is the first flash light modifier we've put on a built-in flash.
Rogue also makes some great light modifiers for external flashes, the FlashBender reflectors that we've used very successfully for event coverage. Our portrait on the About page was shot with one a Nikon D90, in fact.
So putting two and two together, we couldn't help but wish the Safari could convert into a diffuser, too. Built-in flash isn't very powerful compared to a compact external strobe (which typically includes a diffuser dome or at least a white card reflector). But a diffuser would soften the hard light at close distances.
CONCLUSION | Back to Contents
We won't have to stop shaking our heads at people using flash at the ballpark but the Safari does change the game for more modest ambitions. If you're shooting a telephoto lens at 80 feet and not getting enough light, it could be your new best friend.
It's as well made as it is well designed and we have, to our surprise, no trouble recommending it with a full four photo corner rating.