Photo Corners headlinesarchivemikepasini.com
![]()
A S C R A P B O O K O F S O L U T I O N S F O R T H E P H O T O G R A P H E R
![]()
Enhancing the enjoyment of taking pictures with news that matters, features that entertain and images that delight. Published frequently.
A Quick Peek At Alien Skin's Snap Art 4


2 December 2013
Usually we'd publish this news in an Around The Horn article but we've been following natural media conversion software (for lack of a more confusing term) for a long time. We had to try Alen Skin's new release of Snap Art 4.
We take a lot of photos that just don't make it as crisp, sharp images but the composition is compelling enough that we want to do something with the image. Converting it to a painting or drawing doesn't require sharpness, so we always consider that approach.

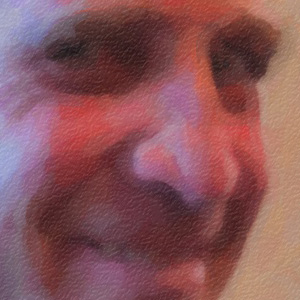
Not Crisp. A portrait that got away from us.
But we also have a lot of images that might look wonderful as paintings. And we have the canvas to print them on, too.
OPTIONS
To indulge this approach, there are a lot of options:
- Image editing software usually provides a healthy selection of art filters, whose parameteres you can fiddle with all day. But even in Photoshop CC, there aren't many sliders for each option.
- There are books devoted to the subject, not to mention effects books with how-to articles. And we've laboriously gone through the various methods trying to find one that works for us.
- Finally there are tools like Snap Art 4 that work standalone or as a plug-in.
Except for the method option, these tools present a list of presets or filters you can apply with a panel of parameters you can adjust for just the look you want. It's very simple compared to building the image manually.
What we don't use these tools for is black-and-white conversion, although they do that too. But that's another story.
SNAP ART
We downloaded the demo of Snap Art 4 and installed the standalone app and the Photoshop CC plug-in. Then we spent a few illuminating minutes Learning Snap Art 4.
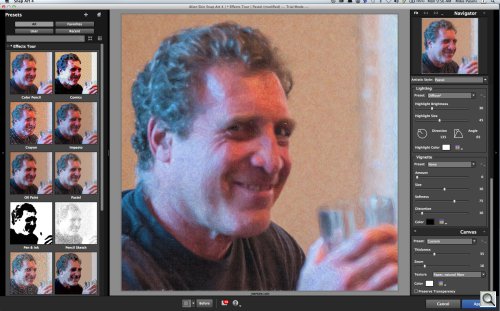
The interface, rewritten for this version, is straight-forward. Presets on the left, adjustments on the right, the Preview (which you can set in various before/after combinations or just click on the Preview to see the original) in the middle.
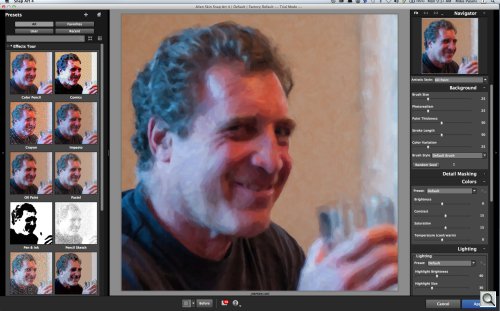
Oil. A new interface.
An oil effect was applied by default but we clicked on the Effects Tour option to see the genres available. They include Color Pencil, Comics, Crayon, Impasto, Oil Paint, Pastel, Pen & Ink, Pencil Sketch, Pointillism, Stylize and Watercolor.
We're a sucker for Watercolor, so we tried that.
Watercolor. With textured paper.
Few approaches to a watercolor rendering offer paper texture options, which are pretty key to watercolor rending. But there it was in Snap Art. We felt we could reach out, run our fingers over the preview and feel the paper.
In fact, in the Canvas adjustment panel we noticed a popup for Texture that included an assortment of canvases, hot and cold press papers, plus other supports like leather, cardboard and wood.
The realism we appreciated, though, was probably because Snap Artpless D lighting to the canvas, which you can control via the Lighting adjustment panel.
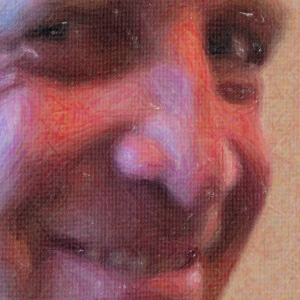
We tried Pencil Sketch next, changing the contrast a bit. We noticed an Automatic Color Conversion option and turned it off to play with the red, green and blue channels independently. Nice to have that.
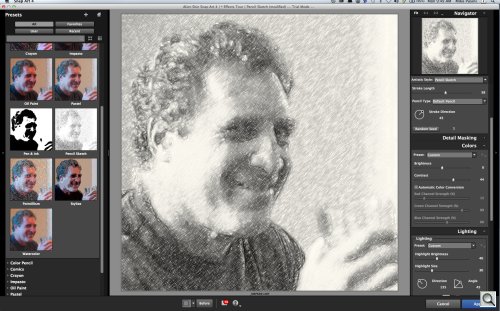
Pencil. Black and White, but not necessarily an automatic conversion.
We gave Comics a shot, too. The defaults were really quite good. But again we fooled around with the Contrast setting. Comics mode has its own adjustments, though, including Color/B&W, Feature Size, Edge Strength, Halftoning, Shading, Shading Scale, Posterization and Shading Pattern. Lots to play with. Just hover over the slider to get an explanation of what the control does.
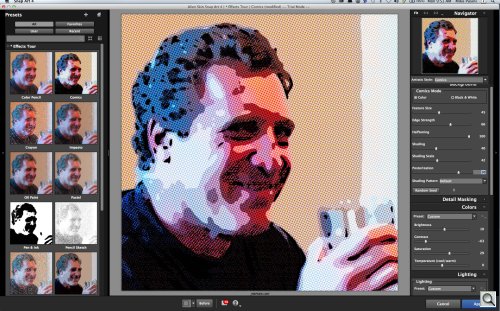
Comics. Even a halftone adjustment.
On our desk there's a framed reproduction of Toulouse-Lautrec's 1887 pastel of Van Gogh drinking absinthe. Color pencil techniques seem to most closely emulate the effect, but we gave Pastel a chance before resorting to that.
Pastel. Several kinds of pastels, too.
We made a number of adjustments but couldn't quite match Toulouse-Lautrec. But we were happy to see a selection of Pastel Typess, including Soft Pastel, Hard Pastel, Oil Pastel and Wax Crayon. We stuck with Wax Crayon.
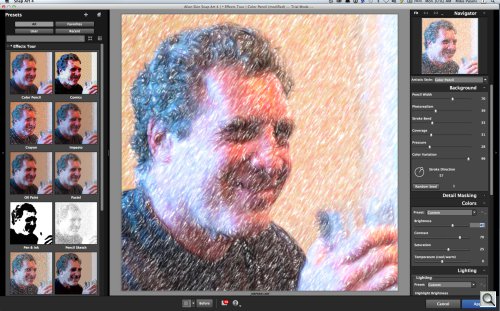
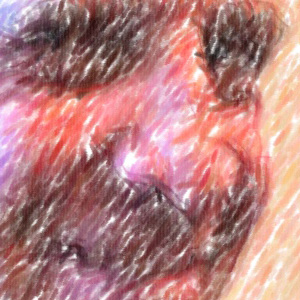
Color Pencil. This one was hard.
So we tried Color Pencil. Here we noticed some white spot artifacts in the rendering. Various settings of the slider eliminated them, though. Still, we couldn't quite get the match we wanted. Toulouse-Lautrec didn't confine himself to just certain stroke lengths.
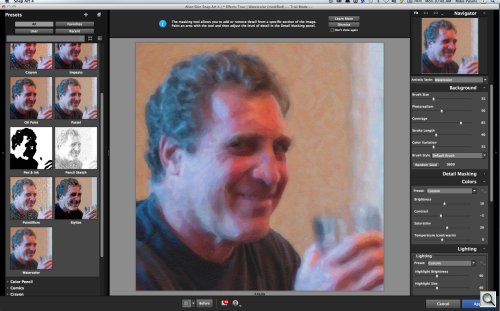
MASKING
But you can mask your image to apply an affect to just that area, so we tried that next. A panel enables the function.
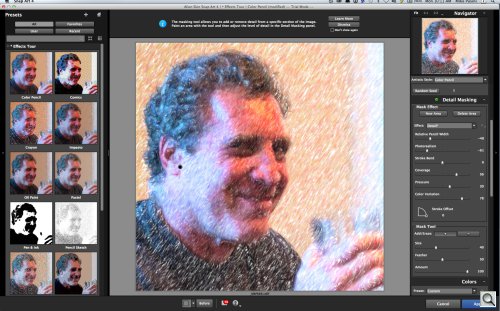
Masking. Easy to mask and easy to affect the change.
And it works as you might expect. Just draw on the image where you want your changes to be active. You can add to or subtract from the mask and you can have up to three of them. They are indicated by a small dot, grey for inactive and black for selected.
100 Pct. Crops
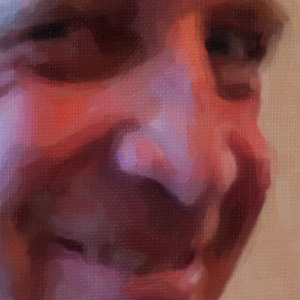
With a mask selected, you can change the parameters within it a different look within the masked area. In this case, we wanted to give the impression the artist spent a lot more time on the face than the wall.
EXPORT
Once you have a look you like, you can save it as Preset so you don't have to make all the changes to the default settings again.
When you Apply your changes in the plug-in version, you are returned to the host application. In our case that was Photoshop CC where the Smart Art rendering appeared as a new layer on the image.
CONCLUSION
When you convert a photo to natural media, you really have two choices: auto or manual. Manual allows you to introduce the felicities of accident to the image, much as a real natural media rendering would. But auto is quicker.
Your options in auto, however, can be so limited that it takes the fun out of the whole thing. We're happy to report that isn't the case with Snap Art 4.
The new interface and improved performance with real-image previews in the presets is a pleasure to use. But the effects are more sophisticated than what we typically find in image editing software. We particularly liked the paper textures and various kinds of media available for each preset.
Being able to mask within the application was a real help, too. It's no secret that not all areas of a canvas get (or should get) quite the same attention by the artist and with masking you can emulate that.
We only spent a couple of hours playing around with Snap Art 4, but it was about 15 minutes of watching tutorials and the rest of it happily playing with our image. And that's enough to give this tool four photo corners for the scrapbook.
Alien Skin Software Ships Snap Art 4 -- Turns Photos Into Paintings or Sketches That Look Handmade
Increased drawing speed and updated user interface make it easier to explore artistic styles
RALEIGH, N.C. -- Alien Skin Software today announces the immediate availability of Snap Art 4, the new version of its artistic natural media application for photographers. Snap Art 4 transforms a photo into a beautiful work of art that looks completely handcrafted. It features a redesigned user interface and improved speed. Snap Art 4 can be used as a plug-in with popular host software or as a standalone program for even greater flexibility.
Snap Art 4 can render hundreds of styles and media, such as oil paint, pencil sketch, watercolor and crayon. It mimics the techniques of human artists, such as layered brush strokes and enhancement of important edges. Snap Art takes care of all the tedious work of drawing brush strokes. For more control, the masking tool can bring out extra detail in areas that need it.
"Using Snap Art 4 simply requires a creative idea, not hand-eye coordination or technical training," said Terence Tay, designer of the new Snap Art 4 software. "Thanks to Snap Art 4's realistic effects, even aspiring photographers can create prints that are worthy of hanging in a gallery."
Snap Art 4's user interface has been completely rewritten to make it even easier to create great artwork. Across the board, everything in Snap Art is faster and more responsive. The modern dark color scheme reduces distractions around the image. The new visual preset browser shows how each preset will look when applied to an image. In addition, favorites and recently used presets are just a click away.
Snap Art 4 integrates with many popular photography tools: Adobe Photoshop, Lightroom and now Apple Aperture. Snap Art 4 can now also be launched as a standalone application.
Pricing and Availability
Snap Art 4 is now available through http://www.alienskin.com for $99. Owners of earlier versions of Snap Art may upgrade for $69. Free upgrades will be automatically sent to everyone who purchased Snap Art 3 directly from Alien Skin Software in August 2013 or later.
Host Requirements
Snap Art 4 may be used as a standalone program or a plug-in. When it is used as a plug-in it requires one of the following host applications:
- Adobe Photoshop CS6 or CC
- Adobe Photoshop Elements 12 or newer
- Adobe Photoshop Lightroom 4 or newer
- Apple Aperture 3 or newer
System Requirements
- Microsoft Windows users need Windows 7 or newer.
- Apple Macintosh users need Mac OS X 10.8 or newer.
- An Intel Core 2 processor or compatible is required.
- A monitor with 1280x768 resolution or greater is required.