Photo Corners headlinesarchivemikepasini.com
![]()
A S C R A P B O O K O F S O L U T I O N S F O R T H E P H O T O G R A P H E R
![]()
Enhancing the enjoyment of taking pictures with news that matters, features that entertain and images that delight. Published frequently.
The Trick To Safely Assembling A Softbox


18 December 2013
Light modifiers travel small but work big. Even an umbrella has to be opened. And larger softboxes actually have to be assembled. That's not a bad thing because that's what makes it possible to transport these huge diffusers in small, cue-stick like cases. But it can be dangerous if you don't know the trick to assembling them.
LIGHT MODIFIERS
Umbrellas are designed either to reflect light fired into them off a silver or white lining or, using just a white fabric, allow it to pass through. Softboxes, which can be rectangular or round, are designed to mount around a light source, optionally firing through a white fabric diffuser placed in front of the light.
Softboxes like the Glow 47-inch Grand Softbox illustrated below require assembly. Their ribs are sewn into the fabric of the softbox but don't fan out into the softbox's full shape until you mount them in a speed ring that itself mounts on your light source.
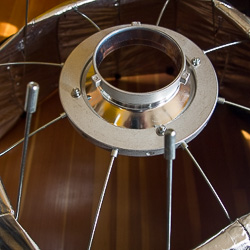
The Glow Grand Softbox is a real challenge. It has 16 ribs that have to be popped into a speed ring, which itself has two parts. There's the inner ring, which mounts to your particular light source, and the outer ring where the ribs connect.
We've seen some pretty tricky (and expensive) speed rings to make assembly easier, including one that folds in half so you can insert the ribs and then unfold it to open the softbox. But you don't really need them if you know the trick.
ASSEMBLY
You can't just start at noon on the speed ring and mount the softbox ribs in sequence. After the first three or so, it becomes impossible to bend the remaining ribs into position. And, yes, you could hurt yourself.
Instead, start by opening any flaps on the softbox at the speed ring end so you have room to work the ribs into the speed ring.
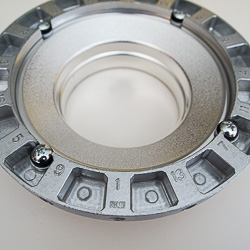
Numbered speed ring (5-9-1-13-7)
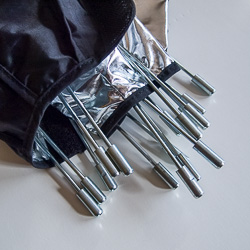
Umbrella ribs, speed ring ends
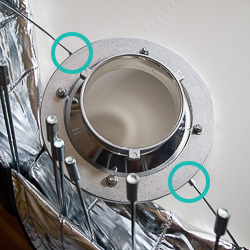
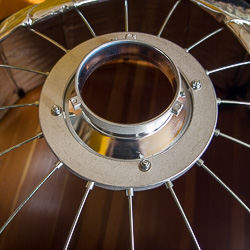
First two ribs in
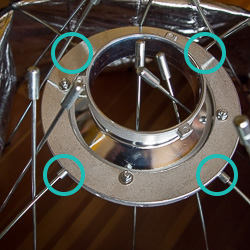
First four ribs in
More ribs
All in (evenly, too)!
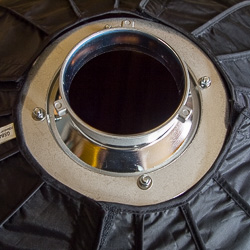
Flaps closed
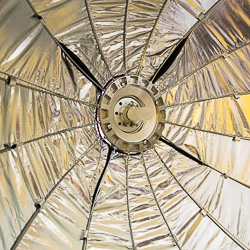
Inside view
Then pop the first rib in. Find the rib directly across from it and pop that in. Next find the rib halfway between those two and pop it in and then find the rib directly across from that one and pop it in.
You should have four ribs in, forming something of a box, with the rest of the ribs dangling complacently but in position to be slipping in between the four installed ribs.
Just keep going until they're all in.
As you pop the ribs into the spreed ring make sure they are fully inserted. Double check when they are all in. Partially inserted ribs should be obvious to the eye.
It may take a minute or two the first time you do it, but you can easily do even 16 ribs in less than a minute after that.
TAKING IT APART
Taking the softbox down is just as easy. Pull one rib out, then pull its opposite. Move 90 degrees and pull another, then its opposite.
If you have difficulty getting a rib out, follow it to its other end where you'll probably find a Velcro latch you can release to let the rib escape the umbrella. It will be a lot easier to remove when it's not bowed but straight.
And it's even quicker taking it apart than it is to put it together.
A LITTLE HELP
Your speed ring may have numbers on it near the holes, as our does, to help you get started but you don't really need them.
And if you went about this all wrong and get hopelessly stuck, remember you can unlatch the softbox slot at the other end of the rib to relieve any excessive pressure.