C O N T E N T S
![]()
Photo Corners headlinesarchivemikepasini.com
![]()
A S C R A P B O O K O F S O L U T I O N S F O R T H E P H O T O G R A P H E R
![]()
Enhancing the enjoyment of taking pictures with news that matters, features that entertain and images that delight. Published frequently.
Scanning Polachrome


23 July 2016
With a little time on our hands this morning (or maybe it was just an obsession), we took a fresh look at the striation problem of Polachrome scans with the OpticFilm 135. These are fine lines parallel to the long edge of the film that appear in OpticFilm 135 scans but not CanoScan 9000F scans.
We were actually looking for some source of Polachrome scans we could forward to Plustek's tech support so they could confirm our results. Instead, we discovered an old explanation for the problem.
A CLUE
A 2006 forum discussion at DPReview touched on the topic, concluding with this explanation by luxor2:
The weird lines are part of the optics of the film, parallel RGB lines similar to your LCD screen RBG triplets. There are 1000 RGB triplets per inch, 3000 lines per inch total. You have the choice of scanning at a low resolution to average the triplets together or scan at a high enough resolution to completely image each of the 3000 lines per inch (hard to do with most scanners). Then blur in Photoshop to get the lines to be less obvious. I suggest scanning at several resolutions and seeing what give the best results.
With a 10x loupe, we were indeed able to detect the lines in the film itself. So we loaded the OpticFilm 135 and launched a new version of VueScan to scan the film at several resolutions.
SEVERAL RESOLUTIONS
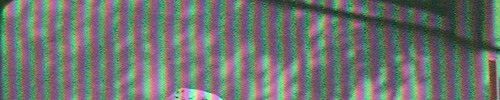
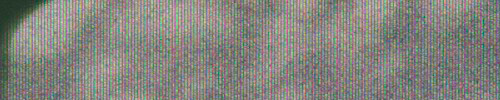
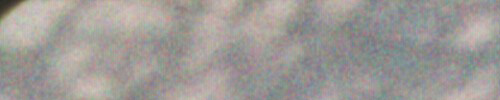
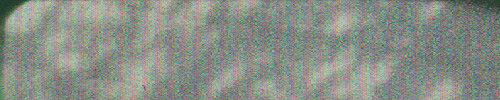
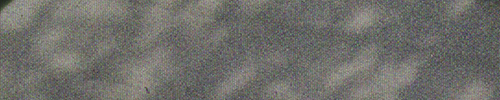
We cropped each scan from the top left corner to 500x100 pixels. Here are the results at 100 percent:
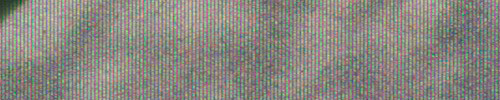
3600 dpi

1800 dpi
900 dpi
600 dpi
So fiddling with the resolution itself doesn't avoid the problem. But scanning at the highest available resolution of 3600 dpi made the lines the least obvious.
TESTED RESOLUTION
Note that the tested optical resolution of the OpticFilm 135 is 2850. So at 3600 we are resolving about 2850 lines per inch, not quite the 3000 of the film lines. Set at 3000 dpi, we got this:
3000 dpi
In contrast, the tested optical resolution of the CanoScan 9000F when set to 9600 dpi is 1,626, nowhere near the 3000 lpi of the lines on the film. And the CanoScan scan of the same slide does not exhibit the striations.
For comparison, here's the same 100 percent crop from the CanoScan with VueScan using 2400 dpi as the scanning resolution:
CanoScan at 2400 dpi
MAGIC NUMBER?
So we set VueScan to scan the slide on the OpticFilm at 1626 dpi to see if that was the magic number.
1626 dpi
Nope. Scan resolution itself was not sufficient to eliminate the problem.
What could the CanoScan be doing that the OpticFilm is not? Well, filtering the scan in some way, perhaps as you might descreen a halftone scan.
FILTERING
We opened the 3600-dpi scan in Photoshop and tried the De-Interlace filter on it several ways, including rotating the image so the scan lines would mimic a color TV. No dice.
We tried all the Blur filters. Smart Blur did the best but it still didn't produce an acceptable image. And we were sacrificing image detail with all of them.
We fiddled with the Custom Filter, too, but we were only able to minimize the lines by increasing the brightness.
RESAMPLING
Finally, we tried resampling the 3600-dpi image down to 1626 in Photoshop using Automatic as the Resampling method. Here's what we got:
3600 dpi resampled to 1626 dpi
Ah ha. That finally eliminated the lines. And, happily, it did not destroy the detail.
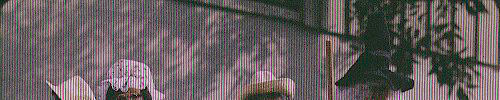
In fact, even at that size, it's clear enough to read the small type on the signs and labels of the dolls:
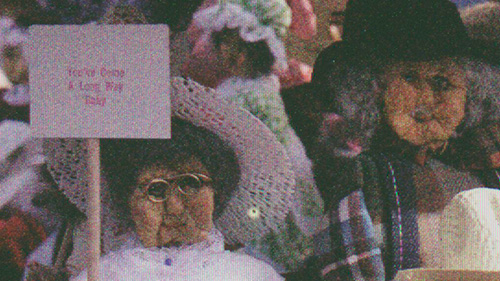
100 percent crop of 1626-dpi reduction
Admittedly, the sign held by the doll is barely readable, but it can be deciphered. It says, "You've Come A Long Way Baby."
FULL CROPS
To put that 100 percent crop in context, here's the full-sized OpticFilm image reduced to 500 pixels wide with a color-corrected version and an uncorrected CanoScan scan as well:
We did try resampling the 3600-dpi scan at several other resolutions and using several different resampling methods but it wasn't until we hit 1626-dpi that the lines broke up. We even saw them at 1600 dpi, oddly enough.
Go figure.
CONCLUSION
That 1626-dpi reduction provides sufficient resolution to print a 10x15-inch print on a 150-dpi printer like an inkjet. And even pushed to 300-dpi for a dye-sub, it's enough for a 5x7 print.
Scan resolution wasn't enough to eliminate the lines in the film, blur filters destroyed too much detail but resizing with an automatic resampling method at 1626 dpi did the trick.
Now back to those Saturday morning cartoons....
Comments
First, thanks for an interesting review of the Opticfilm 135, which is the most detailed that I have found on the web.
As an engineer with some background in signal processing I believe that what you are seeing in the Polachrome scan is a moire pattern resulting from aliasing of the regular, screen-type micro-structure of the Polachrome. Quoting from the April 1985 Popular Photography (pp. 54-57):
Polachrome has sometimes been compared to the Autochrome color process.... But I found that it had even more in common with a similar three-color process invented by ... John Joly in 1895. Autochrome achieved its colors through the random dirstribution of dyed grains of potatoe starch.... But the Joly process arranged these grains, which were in effect tiny colored filters, in a lined screen pattern. The Polachrome image is also arranged on a grid, which is most conspicuous when the slide is viewed through a magnifier.
If you have a regular microstructure where the spatial frequency of the structure exceeds half the sampling frequency (in this case half the optical resolution of the scanner), then you will get aliasing, which effectively reproduces elements of the microstructure on a much larger scale, giving rise to a moire pattern such as is apparent in your image. The size and intensity of the moire pattern will depend on the relationship between the sampling frequency and the size of the micro-structure, so it may not be noticeable on different scanners. Even a slight change in optical resolution can make a significant change in the moire pattern, which depends on a regular "alignment" between the samples and the underlying structure.
-- Andrew Roos
That certainly explains what we were seeing, Andrew. The Polachrome does use a lined screen pattern and changes in scan resolution did change the moire pattern. Thanks! -- Mike