C O N T E N T S
•
Photo Corners headlinesarchivemikepasini.com
![]()
A S C R A P B O O K O F S O L U T I O N S F O R T H E P H O T O G R A P H E R
![]()
Enhancing the enjoyment of taking pictures with news that matters, features that entertain and images that delight. Published frequently.
FastFoto: Installation


22 November 2016
There really isn't too much to installing the FastFoto. And yet, we found it more difficult than it should have been. In this installation of our multipart review, we'll describe our experience with a few tips designed to make the task a little easier.
INSTALLATION
The FastFoto is an unusual device and consequently we found it unfamiliar. So we were very disappointed that the Start Here poster was so little help.
In fact, all the poster tells you is to remove all the packing materials and attach the paper guide. Let's walk you through that.
For some reason, the scanner is shipped with its lid open but taped, two big Styrofoam blocks holding it open.
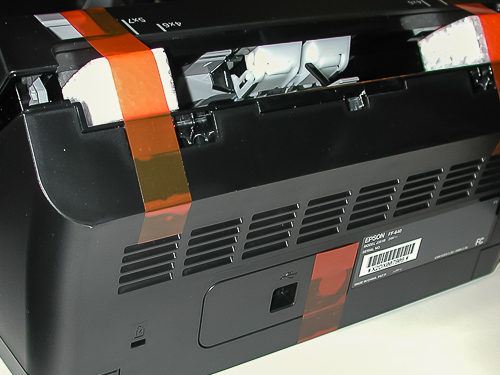
Tape, Blocks. Note the blocks under the tape holding the lid open in this rear view of the scanner.
Removing most of the orange tape was no mystery but we did have trouble with the tape holding the paper tray in. Unlike the other tapes, it was not folded back on itself at either end, providing a handle to pull. So we worked it from underneath the scanner, finding a gap and lifting the tape until that end came free and we were able to pull the tape off the tray.
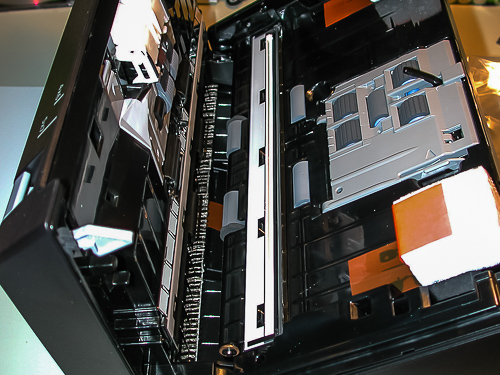
Innards. Nothing to remove inside, though.
Oddly enough, there's nothing inside the scanner to remove apart from the big Styrofoam blocks. In the illustration above you can see the replaceable gray rollers.
In a separate bag you'll also find the paper guide, which we call the feed table. It's only reason for being a separate piece, it seems to us, is to make for a small shipping box.
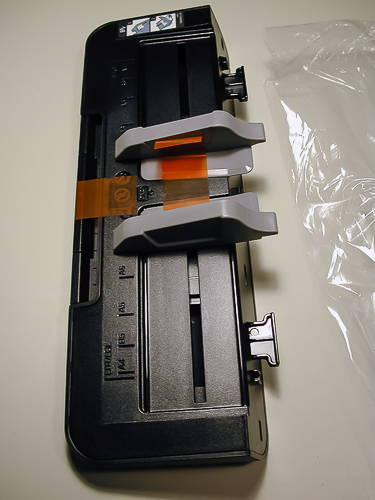
Feed Table. Not the tabs protruding from the bottom edge on the right here.
The orange tape on the feed table was easy to remove but attaching it to the FastFoto was a mystery. When we inserted the tabs into the two holes on the scanner, nothing grabbed hold.
We'd closed the scanner lid after removing its tape so we thought maybe we should open it. But here again, trying to find out how to open it was a mystery. The poster has an illustration but it's not clear.
The release button is the large gray button above the power button. It wraps over the edge of the lid and has an arrow on it. Ignore the arrow. Ignore the shape of the button and its apparent travel path.
Put your finger in the hole behind the button and lift it up. The lid will release.
We also slide the paper guides away from the middle of the feed table and we tried again. The trick seemed to be to angle the feed table into the slots parallel to the ground and when fully inserted, lift up. You should hear a click and the feed table should be solidly attached.
Don't ask us how to remove it. The User's Guide says to pull it towards the lid and then pull it off the scanner. That would be forward and up.
The feed table does extend upwards with a couple of extensions. You won't need to extend it for prints but it comes in handy for scanning documents.
We could have used a little help with the paper tray, too. It slides out in several sections. That part is pretty obvious, although you may find (as we did) that they don't slide out very smoothly.

Paper Tray. Long enough for letter-sized sheet. Note the stop, too.
The real puzzle is the paper stop at the end of the smallest extension of the paper tray. You do have to apply a little force to it to lift it up into position, where it will snap into place to stay up.
If you are (and you one day will) running documents instead of small prints through the scanner, you'll want the paper stop down, we suspect. The tray doesn't extend far enough out for a letter-sized sheet.
SOFTWARE
At that point you can install the software. With the scanner disconnected.
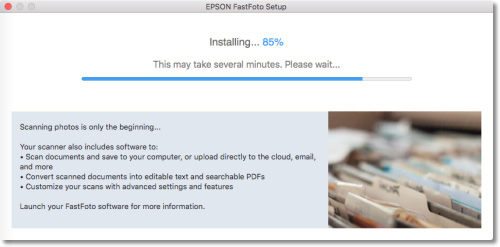
Software Installation. After the sign-on window, you watch this progress bar until the installed software launches.
Because there is no CD included, you have to visit Epson's download page to download the software. The Start Here poster has an alternate URL for Canada, too.
Installation went smoothly, taking just a minute or two. We were directed to connect the scanner to complete the install and we did.
POWER, DATA
To connect the scanner, of course, you have to plug in a couple of cables.
On the back of the unit, you plug in both the power brick's long slim cable and the included USB cable that connects to a USB port on your computer (or a USB dongle).
The power brick connects to a long power cord with a two prong plug that will fit into a wall socket. There's plenty of reach between the power cord and the brick's cable.
UPDATES
When the install finished, we were also directed to restart the computer, but we didn't. This seemed to have no penalty.
And just when we thought we were done, we were advised there was an update that provided us with document and OCR scanning options in separate packages.
It was all a bit confusing but we soldiered on and managed to come out the other end without any injuries.
On a second install, we had the scanner plugged in and powered on and were not directed to connect the scanner. That's not what the poster recommends, though.
A TOUR OF THE HARDWARE
The User's Guide does provide a helpful tour of the hardware.
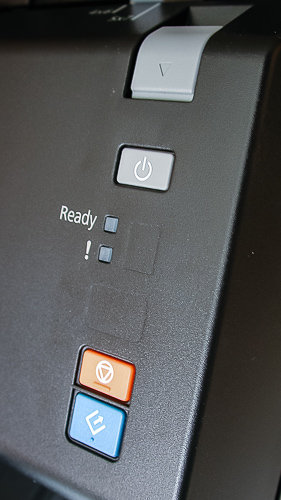
Cover Open Lever, Power Button, Status Lighs, Stop/Scan Buttons
Everything you have to access regularly on the FastFoto is staring you right in the face from the front. There are nine items to get to know:
- The scanner cover or lid contains the main controls and buttons.
- On the top right edge of the lid is the Cover Open Lever.
- Underneath it is the Power button. Below the Power button are two status lights: Ready and ! (for Error).
- Below that are the orange Stop and blue Scan buttons. You can assign a function to the Scan button in the FastFoto software.
- On the left of the lid is the Page Separation Lever. The upper position is required when using the carrier sheet to scan delicate prints. Otherwise, the lower position prevents jams when scanning stacks of prints.
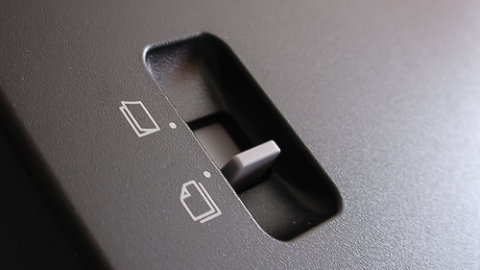
Page Separation Lever
- The Feed Table on top has both side guides and a two-part tray extension for larger sheets of paper. It can handle up to 30 prints at a time.
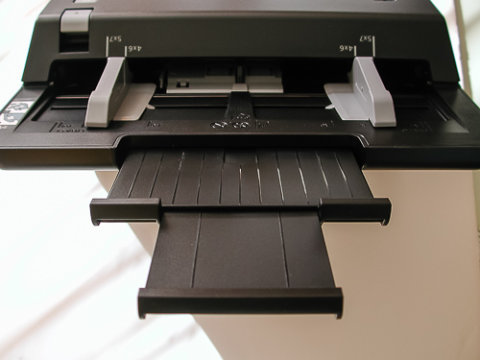
Feed Table Extended
- The Output Tray has an extension and a Sheet Stopper to keep prints in the tray when they are ejected by the scanner.
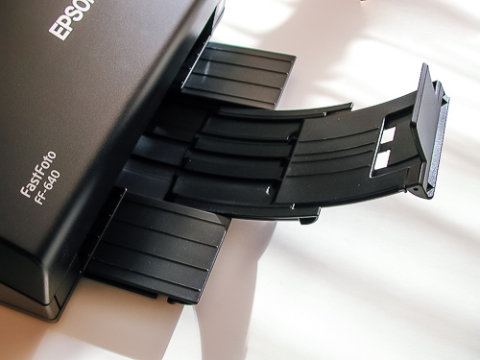
Output Tray Extended with Stop
The back of the unit, which arches gracefully away from the front, is very simple. It has a Kensington security slot, which is not a bad idea for such a small unit, and both the USB port and the Power connection.
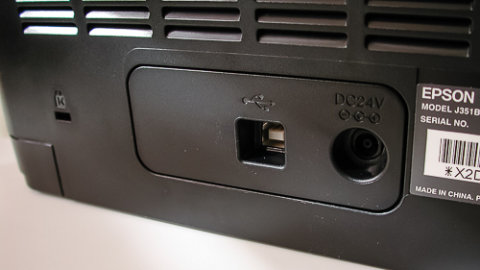
Kensington security slot, USB port and Power port
As we handled the FastFoto we were impressed by how heavy it is. And in fact though it requires very little desk space with a footprint of 5x11 inches it is remarkably stable. It did not vibrate our work table at all when we finally did get to scanning prints with it.
NEXT
In the next installment of our multipart review, we'll discuss our experience scanning our own old prints of various types with the FastFoto.
(Editor's Note: This is the second part of a multi-part review of the Epson FastFoto FF-640. Links to the other stories are in the main table of contents at the top right of each story.)