Photo Corners headlinesarchivemikepasini.com
![]()
A S C R A P B O O K O F S O L U T I O N S F O R T H E P H O T O G R A P H E R
![]()
Enhancing the enjoyment of taking pictures with news that matters, features that entertain and images that delight. Published frequently.
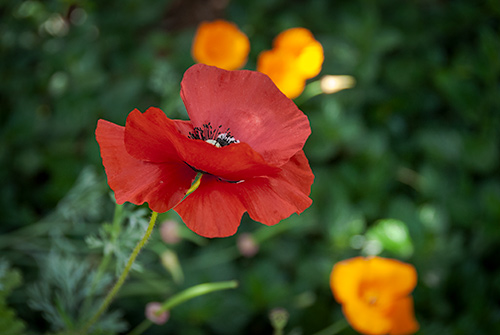
How To Salvage Reds


29 May 2018
As we pointed out in our Memorial Day piece, reds have bedeviled image sensors for a long time. In that story, we briefly described the process we used to recover our red subject, a poppy. But we thought a more complete explanation would be illuminating.
We shot our poppy as a Raw file because, well, we always shoot Raw now. Image editing software is so efficient it doesn't make sense to eliminate the dramatic improvements working with the raw data can provide. And when your subject is a red flower, even more so.
The in-camera JPEG shows the problem we had to deal with. An oversaturated flower with little detail. You can barely discern the edge of the petals.
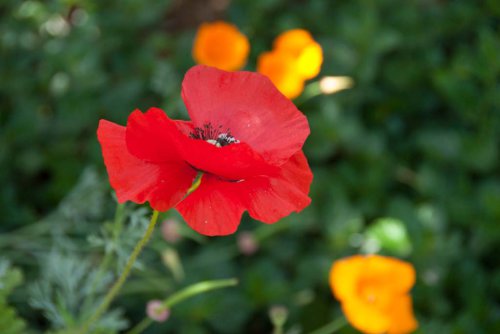
In-Camera JPEG. Oversaturated with no detail.
Opening the DNG in Photoshop CC 2018 brings it up in Camera Raw.
Our goal was really to knock the rest of the image into shape. We realized we'd have to roll up our sleeves to get the poppy to look good but we wanted a dramatic background with a strong dark vignette as well.
When we got that, we tweaked the sliders to minimize the problem but it is still obvious.
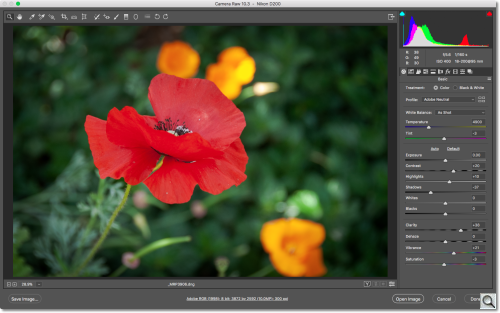
Camera Raw Edit. Better but still not good.
After opening the image in Photoshop itself, we took a moment to retouch the image, using the
Healing Brushto spot out the imperfections in the petals.Then it was time to wrestle with those reds.
We started by selecting the
Magic Wandtool because its toolbar includes the newSelect Subjectoption. It was quick but not perfect but it saved us a lot of time tracing the outline of the poppy.We switched to the . tool to add remove the unnecessary parts from the selection. When we had made our final selection, we copied the selection and pasted it to a new layer.
We opened that layer in the Camera Raw Filter and browsed the profiles, another new feature of Photoshop CC 2018. The goal here was to find a high-contrast monochrome treatment of the reds which we could apply to the main image as a high-contrast mask.
The more detail we could see in the profile, the better. And since the profiles all provide a live view, all we had to do was scroll through them until we found one we liked.
We avoided the light ones and the dark ones and settled for the B&W 04 profile.
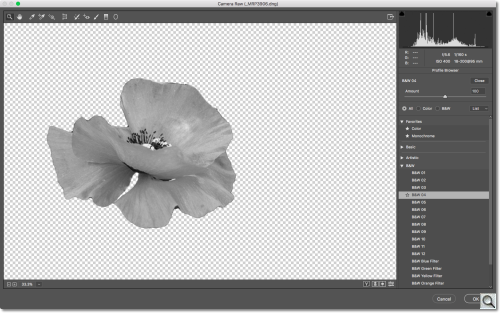
B&W 04. Our instant high-contrast mask.
Applied to the original image, it turned our poppy into a black-and-white flower. At this point we'd done all the tricky work and could start having some fun playing around.
We started by switching the blending mode.
Normalsimply plastered the monochrome image over the color one. We wanted to darken the color image with the monochrome image, so we used theDarkenblend mode.Suddenly our poppy came to life. We could see the individual petals.
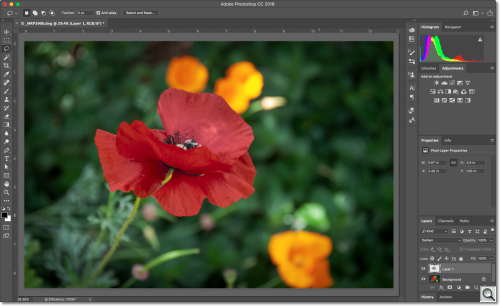
Darken Blend Mode. Detail restored.
But we weren't quite done yet. The image was a little harsh. The delicacy of the petals had been lost. Instead, they looked like they had been sculpted out of concrete.
To recover some of the softness of the color layer, we simply knocked the
Fillof the mask layer down to 75 percent.That's all it took to restore the tonality we'd seen in the field.
Key to the whole operation was having the Raw capture to begin with. That provided enough data to build a useful high-contrast mask with the monochrome profile.
Not so key was the monochrome profile. You can simulate that in any image editor by converting the selection to black-and-white and enhancing the contrast by manipulating the curve.
We walked away from the edited image for a few hours to refresh our perspective. If it still looked good when we returned, we'd publish it, we promised ourselves.
And it did, so we did.