Photo Corners headlinesarchivemikepasini.com
![]()
A S C R A P B O O K O F S O L U T I O N S F O R T H E P H O T O G R A P H E R
![]()
Enhancing the enjoyment of taking pictures with news that matters, features that entertain and images that delight. Published frequently.
Saving Time


8 April 2019
Remember that refrigerator story from last month? Part of the solution has been to do a little plumbing and electrical work for the new unit. Electrical work requires shutting off power at the circuit breaker for any particular outlet and we did that. When we turned power back on, though, the wall clock wasn't moving.
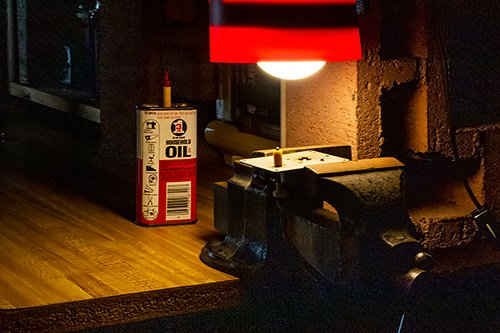
Revival. An old electric rotor getting refreshed lubricant.
Stuff happens, you might say. Or, in this case, doesn't happen.
We'd been through this before with that wall clock. It's wired to a house circuit and is as old as the house. The stamp on the clock plate holding it to the electrical box says Sept. 1962. But we all lie about our age.
A few years ago it stopped after a power failure. The electric company prefers to call these "outages" but they're failures.
We scoured the Bay area looking for a replacement for the old movement. You may be aware that electric movements plugged into a wall or wired to a circuit are no longer state of the art. The world has moved on to battery-powered quartz movements.
But we like to keep on keeping on. Restoration not remodeling.
You may wonder what this has to do with photography. We can explain.
We could hardly believe it when we found one at Otto Frei, a watch company in Oakland by the train tracks near Jack London Square. We drove over, bought a movement and got some free clock hands in the bargain too.
And that replacement movement has been running for nearly nine years. Until, that is, we turned off the power.
"Forget it," Mom said. "Everybody's clock is out. It's just a decoration now." She can't see it anyway, courtesy of her macular degeneration. But we don't like to leave things worse than we found them. And we're bigger than her.
℘
But we weren't keen to drive back to Oakland even if Otto Frei is still in business. Because we learned Lanshire went out of business 30 years ago. If they had the part, we would only be buying a very old one. New only in the sense it had never been used.
So we took the original movement home and hunted around on the Web for some help. And we learned a few things.
The first thing we learned is that the part that fails is the motor, which is composed of two parts: a coil and a rotor. If the motor hums when it's connected to power, the coil is fine. It's the rotor.
Both the old and the newer movements hummed.
So it was the rotor. The grease inside the rotor becomes hardened with age, preventing it from spinning.
To revive the rotor, which you can't easily dissemble, you have to heat the unit somehow. We used a light bulb but some brave souls use toaster ovens at a low heat setting. When the grease is warmed, you can spin the gear attached to the rotor. Easily.
To keep the grease from hardening again, you apply a small amount of 3-in-1 oil to the gear, which is the only place you can see on the rotor. That thins the grease as it gets into the rotor. To facilitate that we ran the motor for a while.
Here's one video showing the process.
Oh yeah, it ran again once we warmed it up (which beats buying a refurb for $50). To celebrate we made a second hand our of duct tape and attached it to the clock so we could watch it to make sure it was still running.
The funny part about this is that when we next looked at Mom's wall clock the newer movement had resumed running on its own. Jealously, no doubt.
℘
You may wonder what this has to do with photography. We can explain.
The camera is, like those rachets and pliers we used, a tool. And when you find yourself peering at hard to see things or things that must be taken apart, the camera is indispensable.
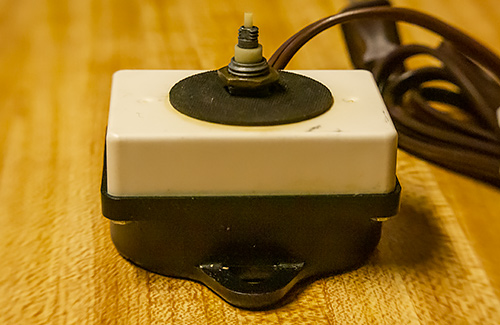
The Patient. Moments before surgery.
We took photos of each step of the process, setting up the camera first so it had a good view of the patient throughout the procedure.
Those photos came in very handy when it came time to reassemble the gears. So did Norko's Lanshire xl7 Motor Installation Instructions, which is similar if not identical to our movement. Not great photos but instructive.
We've repaired a lot of things with our camera at our side. Like ovens and suspension bushings. And examined things like gutters we couldn't safely reach. In fact, it's one thing a digicam with a Macro mode is still very good at.
A small camera can get into places that even a Micro Four Thirds camera can't (not to mention a dSLR). And with a zoom lens and Macro mode, you can see detail a smartphone's wide angle lens can't.
Don't neglect Movie mode either. To see our gutters, we started a movie and lifted the camera on an extended tripod leg to view the damage. That saved trying to time a single shot.
℘
Stuff happens. Things break. They wear out. They get old.
But it's never been easier to fix things. There's likely a video of some guy showing you how it's done. Or a Web site with more information, including obscure parts.
But one of the best tools you can have with you is a camera. Because, it can, you know, save a lot of time.