C O N T E N T S
•
Photo Corners headlinesarchivemikepasini.com
![]()
A S C R A P B O O K O F S O L U T I O N S F O R T H E P H O T O G R A P H E R
![]()
Enhancing the enjoyment of taking pictures with news that matters, features that entertain and images that delight. Published frequently.
Road Test: Vivid-Pix Restore


5 February 2020
Restore is an image restoration application from Vivid-Pix that uses patented artificial intelligence image processing to improve "the color and contrast of scanned, faded images and digital photos, as well as scanned records, letters and documents."
When we learned about Restore, we were wrapping up a job restoring a set of prints for a wedding memorial table. We thought the images might make an interesting test case.
So we took Restore for a test drive on a MacBook Pro running High Sierra.
WHO ARE THESE GUYS
Vivid-Pix was founded by CEO Rick Voight and business partner Randy Fredlund, who have a combined 47 years of experience from Eastman Kodak. Voight also worked for HP and is the scuba diver who once returned from a vacation unhappy with his underwater images enough to see if they could be digitally enhanced.
Fredlund is an engineer and amateur photographer with over 100 patents in digital imaging techniques.
The pair also produce Land & Sea Scuba, which corrects underwater images. Both Restore and Land & Sea Scuba are each $49.99 and run on Windows or macOS.
WHAT'S IN A NAME
Not since the days of MS-DOS have we had to wrestle with an application name in all caps. But here we are again.
Restore appears on your disk as RESTORE and that capitalization is used in the menu bar of the application as well. But we will refer to it here as Restore. Just so know.
INSTALLATION
Installation was without issues. We downloaded the file, ran the application to install it and, after launching it the first time, we activated it. The free trial presumably does not require activation.
Voight and Fredlund send a welcoming email as well, "checking to make sure that you were able to download and install." They also invite you to respond to the email with any questions about the software.
Which is pretty nice customer support.
THE GAME
Restore uses a simple visual selection process to make it easy to optimize the color and tone of an old image whether it is a scanned print, slide or text document.
- Select the kind of fix your image needs among four options.
- Pick one of the nine optimizations you like best.
- Fine-tune the adjustments
Restore's interface is, what shall we call it, not modern. Everything you need is easy enough to find with a button of tools on top, two panes for images and settings below them.
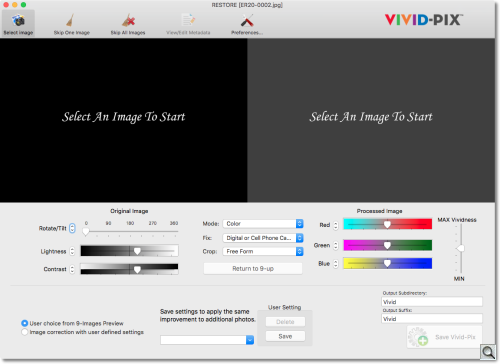
Interface. Not very modern but functional.
The initial screen display is actually the fine-tuning screen. But as soon as you select an image using the
Select Imagetool button, you see a text window shade with helpful instructions and the nine-up display.You can't drag an image onto one of the panes but ⌘-O will open a file. And you can select more than one image at a time.
We found the sliders slightly less than responsive. They slide but there's a slight lag before the image updates. So we ended up clicking rather than sliding.
In the macOS version, drawing a crop on either panel in the fine-tuning window wasn't smooth but functional. But orientation isn't respected in the fixed aspect ratio options so, for example, a horizontal 4x6 creates a portrait crop on the landscape image. To avoid that, there's a 6x4 option further down the popup menu.
The workflow may not be intuitive but it isn't complex, so once you've familiarized yourself with it, you won't get lost. But it would be nice to have a user interface designer clean this up.
The four automatic restoration options include three for photos and one for documents. The photographic options are:
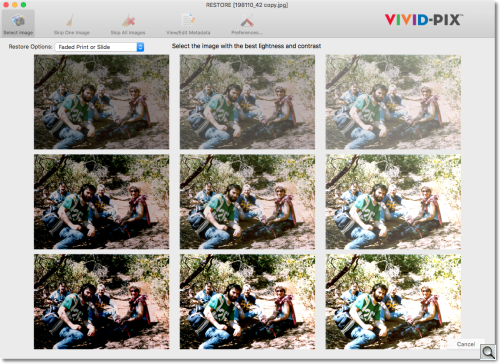
Faded Print or Slide
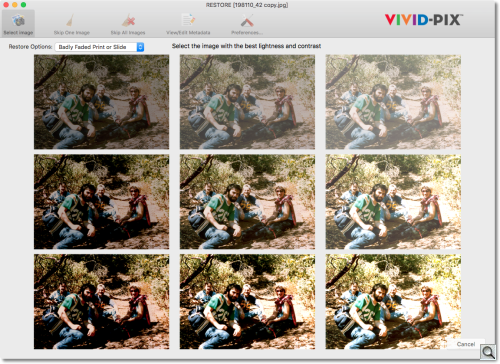
Badly Faded Print or Slide
Digital or Cell Phone Camera
The fourth option is for
Faded Document or Text.Setting that correctly helps Restore make a more intelligent palette of options. But don't worry about the setting. You can easily try them all out to find the set of nine that includes the best image.
Fine-tuning provides quite a few options, including resetting the main option above. It's also where you can change the mode from Color to Black and White or Sepia.
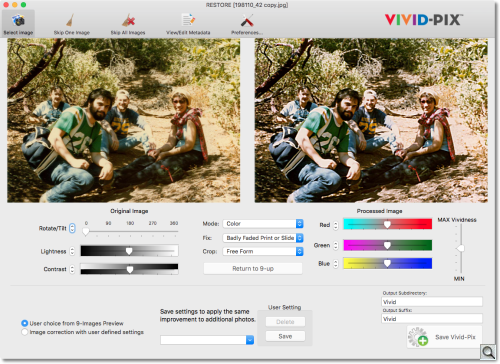
Fine Tuning. Initial display.

Fine Tuning. After an edit (note the sliders).
You can crop with constraints or free form and return to the original nine-up display if you get lost.
You can use sliders to adjust the Red, Green and Blue channels to change the color balance. There are also sliders for both Lightness and Contrast.
You can save your edits to apply them to other photos in the set, too.
You can also view and edit the file's metadata and change Preference settings.
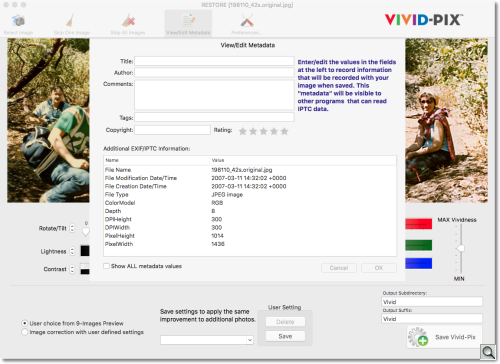
Metadata. You can view an images Exif data or add keywords to a document.
Preference settings include JPEG quality, sharpening intensity, sharpening radius, lightness spread and contrast spread. Sharpening can also be disabled.
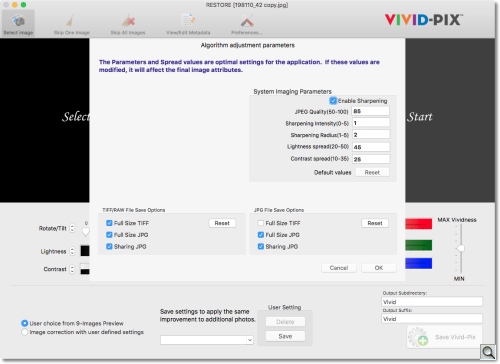
Preferences. The defaults are fine but specific requirements are also easily handled.
There are separate options in Preferences for saving TIFF/Raw files and JPEG files at various sizes. But there's no option to apply a color profile to an image.
Finally, there's a Save button to put the edit in a subfolder of the image's location named Vivid. The original can't be overwritten.
So it's a pretty comprehensive tool for image restoration.
TUTORIALS
Voight has produced seven video tutorials available on the site.
Topics include an Overview, Zoom/Transcribe & View Edit Metadata, a longer Overview, Detail Edit Controls, Cropping, Metadata and Preferences.
The tutorials cover restoring a text documenting and adding searchable text to the document, something we didn't try.
MANUAL RESTORING
As we mentioned, we had been restoring a set of old prints when we installed Restore. We've been doing this sort of thing for about 20 years so we know precisely what we want to do when.
Much of it happens with the original scan. VueScan and SilverFast both offer automatic correction controls that dramatically improve faded originals. But we fine tune our scans in Photoshop where we do a lot of other work like correcting distortion and recreating missing parts of the image.
Is using Restore better than our DIY approach?
No. But we know what we're doing. And we do a lot more than just correct color and tone.
But if you don't know how to restore an image, Restore will help you get much improved results.
Not even a manual method can improve everything though. Our project included an 8x10 print that was actually made from a 353x493 digital file. That's spreading 353 pixels over eight inches for a resolution of 44 pixels per inch. And yes, the print was seriously pixelated (which was perfectly acceptable at a viewing distance of several feet).
And a few others were smartphone snapshots taken of a photo album. So not only were they distorted by the wide angle lens but they weren't taken square to the page and the cellophane protection hadn't been removed so there was substantial glare.
Those aren't the kinds of things Restore handles.
CASE STUDIES
We tried a few scans that we did both manually and using Restore to show you the differences.
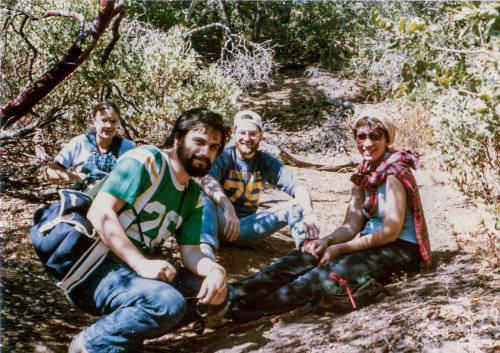
This image was a scan from 35mm color negative film with a decidedly warm cast.
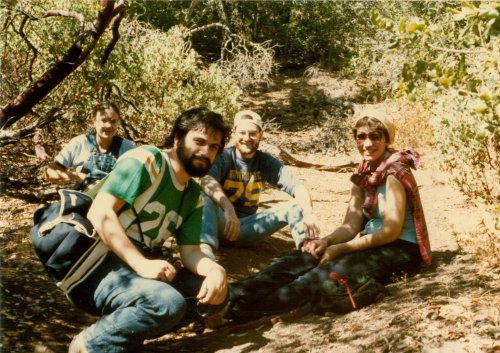
We let Restore work its magic first, then tried our hand at it in Photoshop. The manual method provides a lot more elbow room to edit the JPEG scan, but Restore delivered credible results quickly. Often that's all you need.
We've also included a one-click Photoshop fix using the
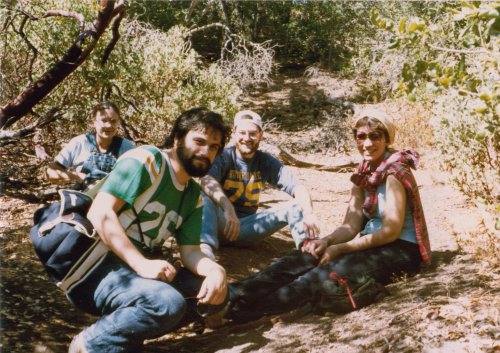
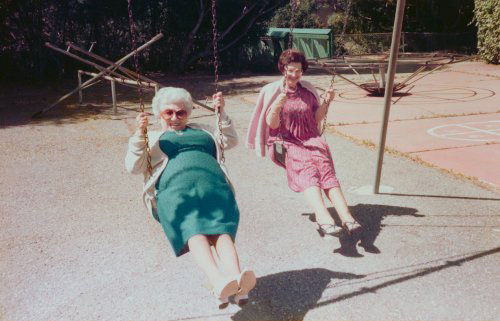
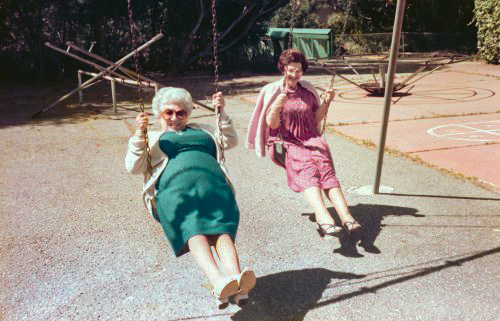
Auto Colorcommand. Under theEnhancemenu in Photoshop Elements you'll find a number of auto corrections as well. We used bothSmart FixandSmart Toneon this image.This photo of these young girls on swings at the playground was badly sun damaged. And for that reason, it didn't make the cut for the memorial table.
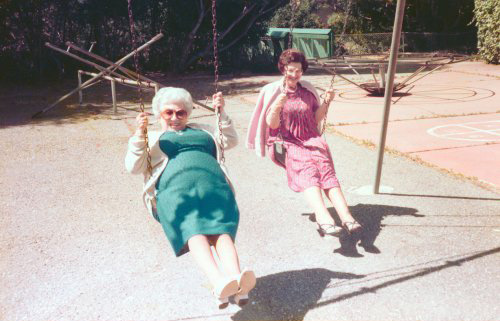
But step one in restoring it was scanning it with VueScan and enabling its restore colors option. That brought it back to life.
As in the first case study, we ran that scan through Restore and Photoshop to tweak the scan. Restore did very well if not quite as good as our manual approach.
You might not realize how much a smartphone image can be improved with a little basic editing. Tonal range is a classic issue but color casts from something as ordinary as kitchen lighting can be a problem too.
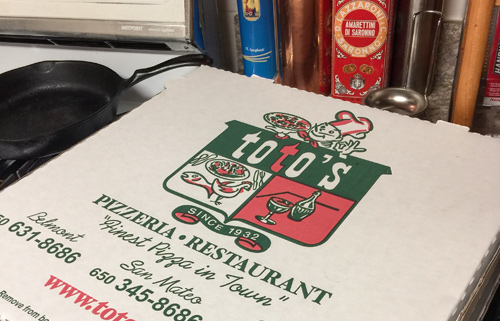
We ran this image of a pizza box in kitchen lighting through Restore and then manually adjusted the original for comparison.
Restore was a little more aggressive than we were, observing the histogram for tonality and using the White Balance tool on the stove top. But both improve the camera image.
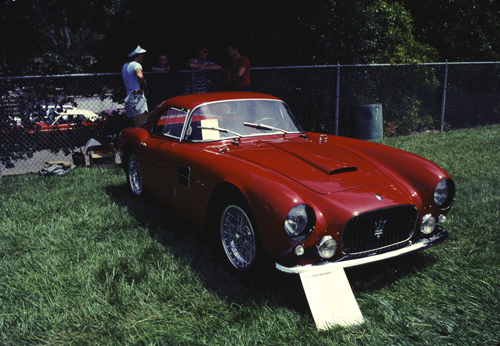
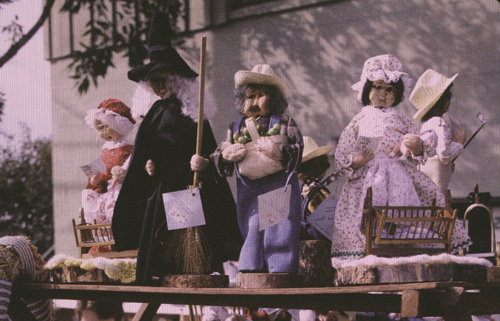
We did have a couple of trying images. These were scans of Kodachrome and Polaroid color positive film but they didn't enjoy VueScan's automatic color restoration. In both cases the nine-up display didn't show an obviously attractive option and it was difficult to fine-tune things.
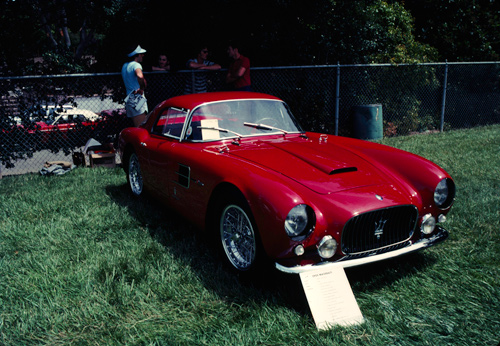
In one case (a red Maserati on Kodachrome), we couldn't rescue much detail in the shadows or get a bright red. In the other, a display of dolls, it was hard to achieve a neutral white balance.
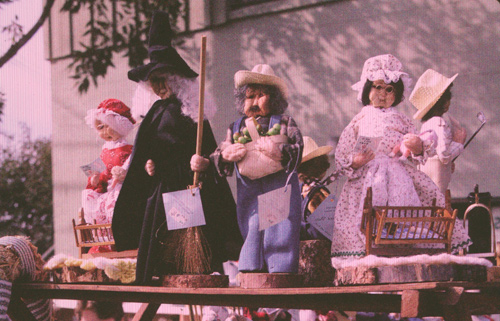
It would have helped to have a white balance tool to click on what should have been a black tire or a white dress to neutralize what are admittedly poor scans. But that, apparently, is what the artificial intelligence of the nine-up displays is doing.
A VALENTINE
Vivid-Pix has posted a Valentine's Day Gift Recipe that describes how Maureen Taylor, The Photo Detective, restored her parent's wedding album.
The story includes a free Microsoft Word editable template to create a Valentine's Day card with a restored image.
The card can be printed on your own home printer, a photo finisher or at Vivid-Pix.
PRICE, AVAILABILITY
Restore is available directly from Vivid-Pix for $49.99.
Versions are available for Windows 7 and up (although some users have issues with Windows 7 that are evident running the free trial) and macOS 10.7 and up.
CONCLUSION
We'll admit the interface put us off at first. But as we worked with it, we realized the interface wasn't reflective of the power of Restore.
It did a very good job of turning faded images into credible ones without requiring any specialized knowledge. Just the ability to pick between options.
The one question we can't answer is whether or not you need it.
Your scanning software may include color restoration already and if you use an image editor like Photoshop Elements, you also have some powerful automatic color and tonal correction tools. But if you need more help to get a pleasing image, Restore is worth looking into.
Restore is the answer for anyone who occasionally has to scan old images and needs more correction than their scanner software or image editing software offers. That may not be many people, but you know if it's you.
"Our target customer are consumers who do have shoeboxes/albums/closets of photos and documents -- may/may not have another program -- and are looking for a fast, easy and inexpensive way to improve these images," Voight told us.
Three corners for the smarts built-into this easy-to-use package that solves a problem many find difficult to grasp.