Photo Corners headlinesarchivemikepasini.com
![]()
A S C R A P B O O K O F S O L U T I O N S F O R T H E P H O T O G R A P H E R
![]()
Enhancing the enjoyment of taking pictures with news that matters, features that entertain and images that delight. Published frequently.
Test Drive: Adobe Camera Raw 12.3


16 June 2020
It didn't take long to find a metaphor for today's Camera Raw update from Adobe. Goats may not seem to be quite the right message but, in fact, they are marvelous weed mowers.
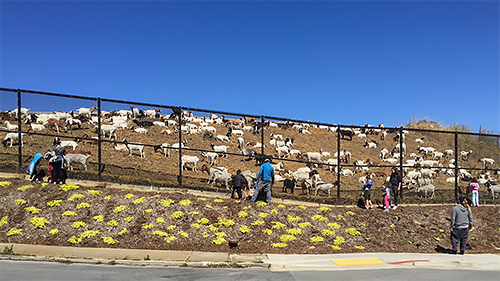
Goats. iPhone 6 capture courtesy of Joyce Abbott. Edited in Camera Raw 12.3.
When goats are done with a hill, it's closely cropped, cleaned-up, pristine. That's a little like what Adobe has done to the interface of Camera Raw.
It's cleaner.
In one respect, it's a little too clean. If you don't watch the goats, they'll eat your flowers, too. And it seems ACR has removed the little tick marks on its sliders in favor of a cleaner look.
We're really going to miss the tick marks.
We have our favorite tick marks for certain sliders. We'll have to punch in the numbers from now on apparently. Too bad. We like sliding around more than punching numbers.
But in general the appearance is indeed much more pleasing.
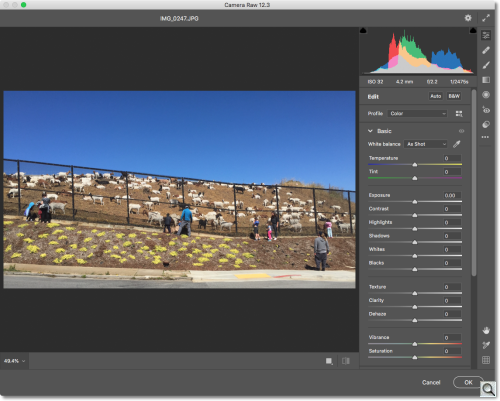
ACR 12.3. A cleaner look (top) almost hides the toolbar (right) while individual tools get tips like the color gradations in the Curve tool and text tips in others.
We don't at all mind moving the toolbar to the right. It does save mouse tire wear.
There's also a handy little preference we think is new to leave the dialog window open until you close it. So you can have multiple ACR windows going at once. This helps optimizing multiple image with the same effect.
Filmstrip mode has a few nice tweaks to make it easier to work on multiple images in one window as well.
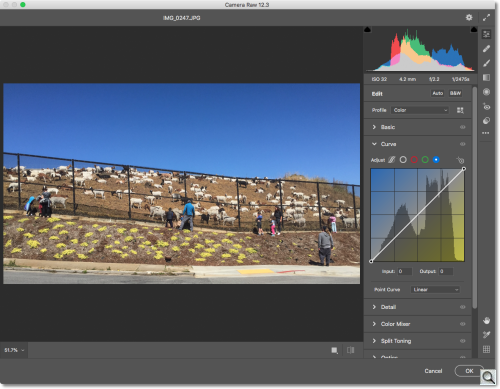
But one of the most impressive new features is the Hue slider in the Adjustment Brush.
Hue Slider. Select an area, open ACR and use the Adjustment Brush's new Hue slider to change the color without affecting the saturation or brightness.
We made the selection using the Color Range tool.
We found that within ACR, the brush didn't restrict itself very well to the selection but once applied to the image, it was a perfect color swap. Go figure.
In our overview story published earlier today, we included a video preview of the ACR changes that included a Crop tool. As in the past, the Crop tool is not available when Camera Raw is called as a filter, only when Camera Raw is opened directly.
Editing a JPEG (as we are here) uses Camera Raw as a filter, so we don't see the Crop tool.
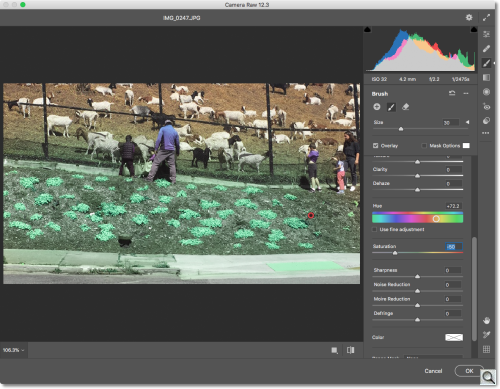
100 Pct. Crop. Final edit after Geometry, Clarity, Highlight Shadow adjustments. We can still get what we want.
But we did notice more help than usual. The Curve tool for instance adds gradations when you select a color channel so you know what hue you are moving toward. And the geometry tool reminds you to apply lens corrections first for the best results.
Of course ACR will still open a thumbnail to fill its screen, exceeding 100 percent without a care in the world. We've lobbied for restricting it to 100 percent (because enlargements make no sense whatsoever). Clicking on the Enlargement tool used to take care of that but the goats ate that tool too, leaving just the popup of enlargement sizes.
Adobe explained the change to the
Zoom tool to us. "In the past, customers would need to toggle between the Hand and Magnification tool. Now, the magnifying glass is 'on' by default, and customers can use the Hand icon to disable magnifying glass and pan through their image using the Hand tool." We're pretty sure-footed so we'll adapt to the changes, no doubt. And hope that a few of our favorite weeds grow back.