C O N T E N T S
Photo Corners headlinesarchivemikepasini.com
![]()
A S C R A P B O O K O F S O L U T I O N S F O R T H E P H O T O G R A P H E R
![]()
Enhancing the enjoyment of taking pictures with news that matters, features that entertain and images that delight. Published frequently.
Resurrecting a Dead Mouse


19 August 2020
Every once in a while you get the gratuitous miracle. We got one today when our antique Wacom Intuos 2 mouse can back to life. All we had to do was breathe on it.
Well, not quite. We had to take it apart, clean it and find out what had killed it. Only then were we able to figure out how to revive it.
But the lessons we learned may be worth filing away for future reference. Particularly if our fix doesn't last.
WHAT HAPPENED
We were scrolling around yesterday like we usually do, relying on the wireless mouse to make our selections and drag and drop because we find using a mouse for those things easier than using a trackpad.
Suddenly, though, the scroll wheel just spun freely. No clicks. And the cursor failed to budge.
We had that fatal feeling.
No way was Wacom going to 1) replace it or 2) fix it. We did find one on eBay for $19 but it was used (and who knows how used) itself.
Did we want to shop for a wireless mice?
Not really. Not only do they cost money but they either 1) require a USB dongle or 2) use Bluetooth. We like the Wacom USB connection to the tablet (we aren't giving up the tablet) that makes the wireless mouse feasible.
Could we fix it?
RESEARCH
If you want to know how to take something apart and fix it, you search for the thing on YouTube. There will be someone with a three minute video showing you how they did it.
So we did.
And we found a YouTube video showing how to take apart and repair a similar Wacom mouse. And we also found an article with clearer still photos.
Those showed us how to take the mouse apart.
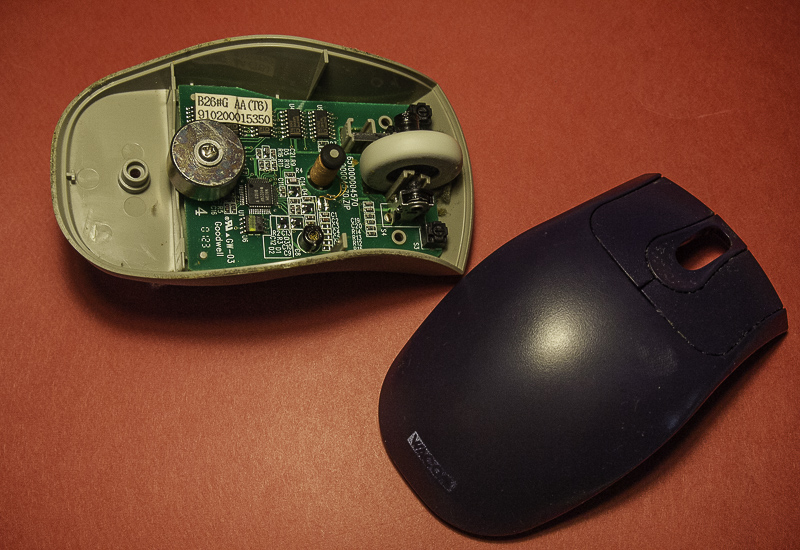
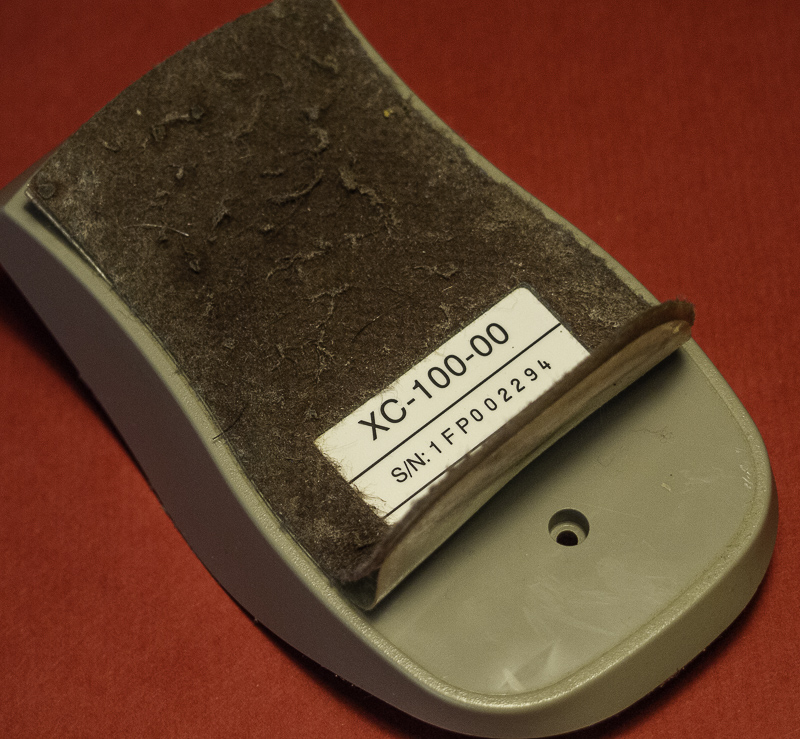
DISSEMBLY, CLEANING
Peel back not just the felt pad (which is replaceable) but the clear plastic liner to reveal the three screws. Once they're out, you can lift off the top with its buttons.
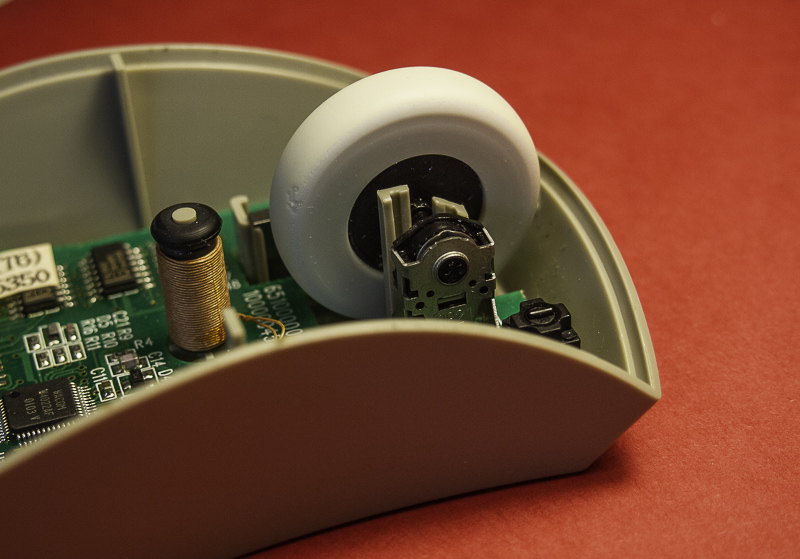
We've had this unit in service since 2001. That's 19 years of dirt sucked through the openings around the buttons. In the fifth photo of the slide show that isn't a felt pad in front of the thumbwheel. It's dirt.
So we cleaned the dirt from the plastic body parts as well as the dirt that had rolled into the mouse via the scroll wheel.
And we used our Giotto blower to puff out anything else we couldn't see.
But cleaning didn't restore the mouse.
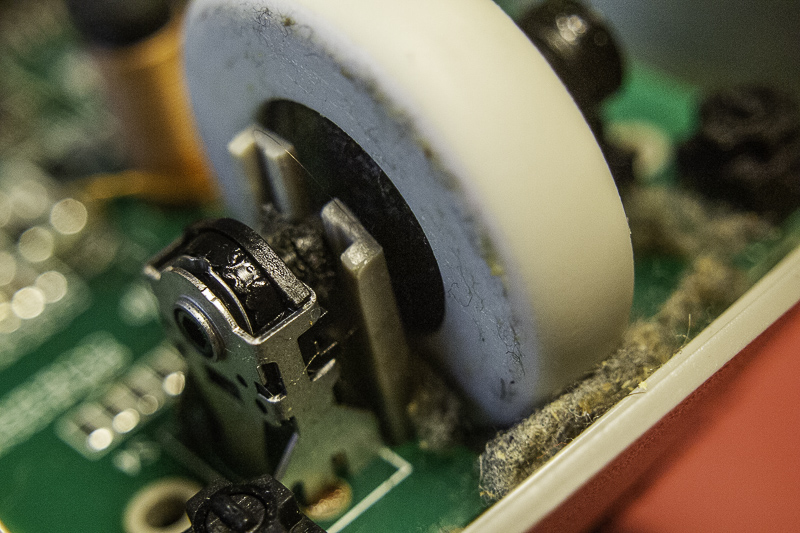
THUMBWHEEL
We carefully pried the thumbwheel out of its brackets, lifting the bigger side up and angling the little spindle out of the potentiometer.
The spindle is greased so we worked a bit harder to remove the dirt that stuck to it.
We noticed that when we held the spindle with one hand, we could rotate the thumbwheel tire with the other. They should stick together. But the tire was slipping.
The repair research we did suggested using a small rubber band to provide some grip between the wheel and the tire. We didn't have anything small enough but even so, that would have raised the tire a bit and it sits in the wheel not just on it.
So we preferred to use the super glue alternative, coating the wheel in the glue and seating the tire back on. It's not permanent but it helps.
The wheel still spun freely when we mounted it back in the mouse, though.
THE PROBLEM
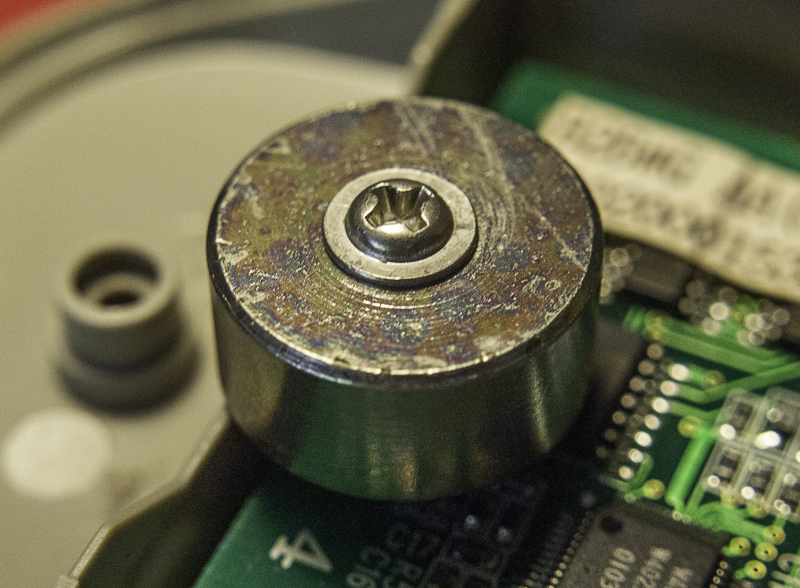
The real problem wasn't visible with the naked eye. We had to use a magnifier to examine the end of the spindle.
The end left the factory shaped like a hex nut. And the potentiometer in which it sets is hex-shaped too. That hex lock is what converts the wheel rotation into a click on the potentiometer.
Our spindle's hex shape had worn round. It was just spinning in the potentiometer's hex hole.
You might think we have a bunch of old mice with scroll bars around here but we don't. We don't go through things very fast around here. They last and last.
So no cannibalization. We were looking at shopping as an alternative.
GLUE AGAIN
But surfing around the Web again to find a solution, we ran across a guy who used blue painter's tape to fill out the spindle and fit it into the hex hole.
We tried that but our spindle was too greasy and too small for the tape to stay on.
But a comment on that article recommended super glue. Just dab it on the end, let it dry and insert the spindle back in.
So we tried that. And it worked!
CONCLUSION
We left the felt off for a smoother glide over the tablet. We might add some felts later to protect the tablet but we thought we'd give this a try.
But we kept the weight. You can leave it out if you like a lighter mouse.
Another thing we might try (if this fix fails) is baking soda.
We had just been watching a video about mixing baking soda to create a filler. We're not sure we want a rock-hard filler or that we'd be able to mount the spindle into the hole before it hardened. But if this repair doesn't hold, we'll give that a try.
We've got nothing to lose. If it doesn't work, we'll just go buy a wireless mouse.
Update (9 Sept.): Alas, my first fix failed a few days ago. Undaunted, we moved on to Plan B, putting a drop of super glue on the worn end and touch it to some baking soda for instant cement. We filed that into the hexagonal shape of the spindle end, put it back in and squeezed it in tight. That seems to have made it quiet and more secure. It's been five days so far with no more trouble.
Update (29 Sept.): After a further 20 days, the mouse is still scrolling like new. We suspect squeezing the spindle into the potentiometer mount made the big difference. The thumbwheel moves silently and smoothly without missing a click.