Photo Corners headlinesarchivemikepasini.com
![]()
A S C R A P B O O K O F S O L U T I O N S F O R T H E P H O T O G R A P H E R
![]()
Enhancing the enjoyment of taking pictures with news that matters, features that entertain and images that delight. Published frequently.
About That Lemon (and Deconvolution Sharpening)


6 May 2021
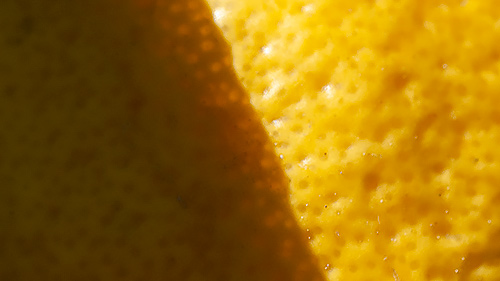
We had applied our usual corrections and enhancements to our macro shot of lemon skin the other day and left it at that. It was the best we could do, after all, even if it didn't appear entirely sharp to us.
Deconvolution Sharpening. We use it like a sand wedge.
The lack of sharpness didn't detract from the detail we wanted to show but it still bothered us because the bright areas of the image were not quite sharp. They weren't blurred, but they weren't sharp either.
It was shot with an old lens. A 1980s Vivitar Series I 70-210mm zoom, which was an affordable technological marvel for its day. Maybe that was the issue.
But even that explanation did not make us feel any better.
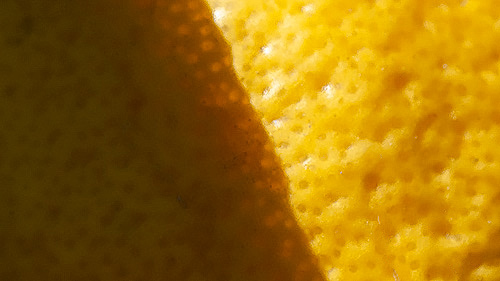
So it was time to apply a little Deconvolution Sharpening. It's something like a sand wedge in our golf bag. You don't want to use it unless you have to. And we had to.
The idea behind Deconvolution Sharpening is that an image has been convoluted or compromised by, say, some physical limitation of a lens. We can deconvolute that convolution mathematically to move the image closer to where we expected it to be.
The technique has been particularly helpful in correcting distortions in optical and electron microscopes as well as telescopes to create clearer images. But it works just as well on 40-year-old zoom lenses.
And it is a technique. Nothing to buy here, although you can find actions and plug-ins to do this for you. But sometimes there's nothing like rolling up your sleeves and getting your hands dirty with flour and water to make something.
This is one of those times.
We used the instructions from Greg Benz's illuminating article What Is Deconvolution Sharpening and How to Use It (slightly edited).

Layers. The duplicate on top has been converted to a Smart Object whose mask is selected for painting out any artifacts with black.
- Duplicate your image in another layer
- Convert that new layer to a Smart Object
- Open the Camera Raw Filter's Detail panel
- Slide Radius left, Detail Right and fiddle with Sharpening
After finding the level that works best, you'll notice some artifacts. Don't worry, we can reconvolve them after apply the Camera Raw adjustment.
To do that, click on the Smart Filter mask (that little white box) and use the Paint Brush to paint black on the mask where you see artifacts. That erases the deconvolution effect, letting the original image show through.
Once you've done what you can with that, you can Flatten the image into one layer and use the Healing Brush to touch up anything left that doesn't please you.
The difference in the two images can be seen in our slider comparison above.