C O N T E N T S
Photo Corners headlinesarchivemikepasini.com
![]()
A S C R A P B O O K O F S O L U T I O N S F O R T H E P H O T O G R A P H E R
![]()
Enhancing the enjoyment of taking pictures with news that matters, features that entertain and images that delight. Published frequently.
Moving to Monterey


13 September 2022
We've had a good experience running Mojave and Catalina on unsupported Apple hardware. We're grateful to Collin the dosdude and his friends for making the modifications that run those versions of macOS on our 12-year-old hardware.
But recently we ran across a different project called OpenCore Legacy Patcher that makes it possible for our MacBook Pros to run Monterey, which is as current as you can get. Well, until next month anyway.
We're a little late to this project and there's an ominous warning attached to it:
As the situation develops back home with my family in Ukraine, I am unlikely to continue the development of OpenCore Legacy Patcher in the near future.
That was posted in May. Meanwhile there's a forum to discuss any issues. But we really haven't bumped into anything serious, as you'll see below.
THE PROCESS
There are several pages of documentation that walk you through the install and there are a few videos that show what happens as well. But we found them all more confusing than they had to be.
You download the patcher app, install it on a thumbdrive, boot from it to download the Monterey installer from Apple and launch it to it to create an installer that will download the latest macOS installer. Reboot to run the newly-created installer on your hardware. Once it's up and running (which takes a while), you can patch the installation to boot without the thumbdrive.
So it's pretty much the same nerve-wracking experience any macOS install is.
TEST DRIVE
We have an external drive connected via USB 2.0 that we use as a sacrificial lamb. We installed Monterey on that and when it came up, we walked it through a few basic tasks to see how (or even if, for that matter) it performed.
Smooth, that's how. Catalina always seemed half-baked to us. And Big Sur a fresh pan of half baking. Not to mention Ventura (still in beta) which seems still to need a second rising before hitting the oven.
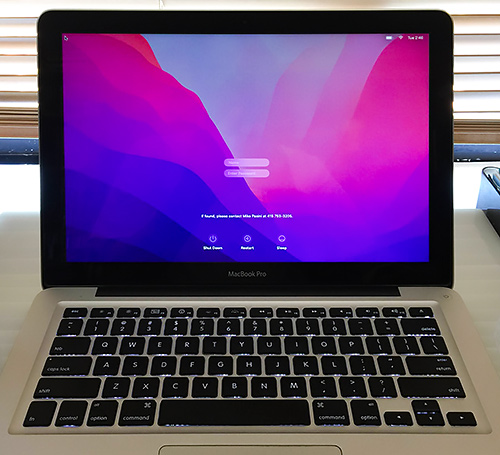
JUST RIGHT
But Monterey feels just right. Mature.
It doesn't look right (the flat graphic design has to grow on you) but we can work around that.
So we took the plunge and installed it on our backup MacBook Pro the first Sunday of the month. When we work out any kinks there, we'll install it on our production machine.
We were amused that, just as we worked out the kinks over the weekend, Monterey was updated to version 12.6 from our installed 12.5.1. So part of the testing became installing the update.
SOME KINKS
Naturally, there were a few things to adjust. We spent much of Labor Day tinkering with them and chased a few tougher problems down in the days following.
That transparent menu bar is one of them. We just found it impossible to read the icons at first.
The free app Menu Bar Tint helped there. And converting icons to white from black also helped.
But even better, we've found, is to hide the menu bar on our 13-inch screen, much as we hide the Dock. That gives us a precious few more pixels of screen space on that small screen (which was before Retina resolution).
By the time night fell on the first day, we were disappointed to find our keyboard was no longer backlit. Something to do with enabling hidd in Monterey.
But Lab Tick puts a slider and a few options on the menu bar to deal with that. In a few seconds we had a backlit keyboard again.
It's old software and a little rickety so far. But we've found a command line tool that we can wrap a Keyboard Maestro macro around when the dust settles if Lab Tick doesn't settle down with the dust.
More seriously for us, Monterey no longer includes a PHP installation. Perl, fortunately, is still included. But not PHP.
We rely on PHP running Web apps under Apache for quite a bit of software written years ago managing MySQL databases for finances, our library and other things, some of which include even small Photo Corners conveniences like showing the time since the last update.
Since we updated our code to run under PHP 7 on Catalina, PHP 8 has been released with all sorts of little mines to blow up your code. Looking over a few, we decided to stick with PHP 7 initially. Adding
isset()to, in effect, double test for variables just didn't seem like a worthwhile way to spend our time.But using Homebrew to install PHP 7 and modifying the configuration files for Monterey's Apache didn't get PHP running our apps. We spent a week modifying and reinstalling the installation without making any progress. It was maddening.
We confirmed our MySQL databases were intact so PHP wasn't failing there. And we confirmed our Adobe Spry AJAX code still runs without an issue by running the Adobe sample code. And Photo Corners itself, which uses a tiny bit of PHP code here and there, was running it locally.
That gave us a clue.
We had some include files that were unconventionally named but the big problem was that we were relying on the
<?short tag to introduce PHP code when the new PHP installation only understood the full<?php.We had to either change all those short tags or enable the feature in php.ini with
short_open_tag=On, which is a bit safer.We're still testing some production processes.
We were able to run our unsupported Canon 9000F scanner with SilverFast 9 and Vuescan, both of which had new versions available. And Image Capture also ran the scanner.
There was a brief scare when the scanner fell asleep waiting for an installation and the software couldn't wake it. But we just cycled the power on the scanner and all was well.
Our Keyboard Maestro macros that call ExifTool ran normally.
But not the ones using PerlMagick. For some reason, the Magick.pm file wasn't in found anywhere in the @INC array. Which, you'd think, would be simple to fix. But we see it there so we can't quite grasp what the problem is.
We did backup the system to our network drive, which was also an adventure, which we describe below.
And it wouldn't hurt to launch Photoshop and Lightroom, among other imaging software we regularly run, too.
So we've got some work to do before we rely on Monterey for production.
HARDWARE TOO
You may remember from Go to Cart that we were going to upgrade our network with a 4-TB WD Passport and AX55 TP-Link router. That's required some tweaking, too.
We snuck the router in between the Sonic-required AT&T Pace router and our still-handy Apple Extreme router. So we didn't have to reconfigure all our smart plugs, Google Home and Chromecasts (well, just the problematic one). We just added capacity and drew on it where appropriate.
The old Pace handles the slow Wireless B devices (like the smart plugs and Wireless printers). The Extreme handles one Chromecast that it has always handled very well. And the new TP-Link handles everything else.
We had to juggles some settings and optimize the cable connections, but it's worked out pretty well. We've even gotten a little more desk space out of it somehow.
Setting up the WD Passport as a Time Machine backup to the two laptops was tricky.
We partitioned it into two 2-TB volumes, one of which is devoted to Time Machine and the other to our photo archive.
Each of the 1-TB WD Passports directly connected to USB ports on the laptops can now have their Time Machine partitions (500-MB) erased and deleted so the partitions with our photo archive on them can expand beyond 500-MB.
But first we had to do backups to the new 4-GB drive. And that wasn't going too well. Time Machine could see and use the partition but it wasn't completing a copy.
The trick is to turn off journaling on the partition using this command:
diskutil disableJournal /Volumes/[disk name]Once we did that, we were good. We needed to reconfigure our archiving and backup system because we'd run out of space. And this takes care of the problem nicely.
We were, frankly, shocked when we tested the network backup and found it to be very quick to mount. Time Machine network backups use a different file structure than backups to USB external drives. That worried us (no more peeking at them with the Finder) but Time Machine's interface was much improved.
Our first attempt to archive photos to the network drive and the two newly-cleared partitions on external USB drives worked flawlessly, too.
CONCLUSION
We thought Catalina was pushing it on this hardware and didn't expect to be able to run Big Sur let alone Monterey on it.
When we installed Catalina, we wrote:
But before 2022 ends, we hope to be running Monterey on an M1 as our main production box and keeping an eye on Apple's refurb store to pick up a backup unit a few months after that.
Well, the M1 has since been superseded by the M2 and we're running the current shipping macOS (Monterey) on an 11-year-old MacBook Pro (and soon, probably, on a 12-year-old MacBook Pro).
Wonders never cease.