Photo Corners headlinesarchivemikepasini.com
![]()
A S C R A P B O O K O F S O L U T I O N S F O R T H E P H O T O G R A P H E R
![]()
Enhancing the enjoyment of taking pictures with news that matters, features that entertain and images that delight. Published frequently.
Amber Waves


28 June 2023
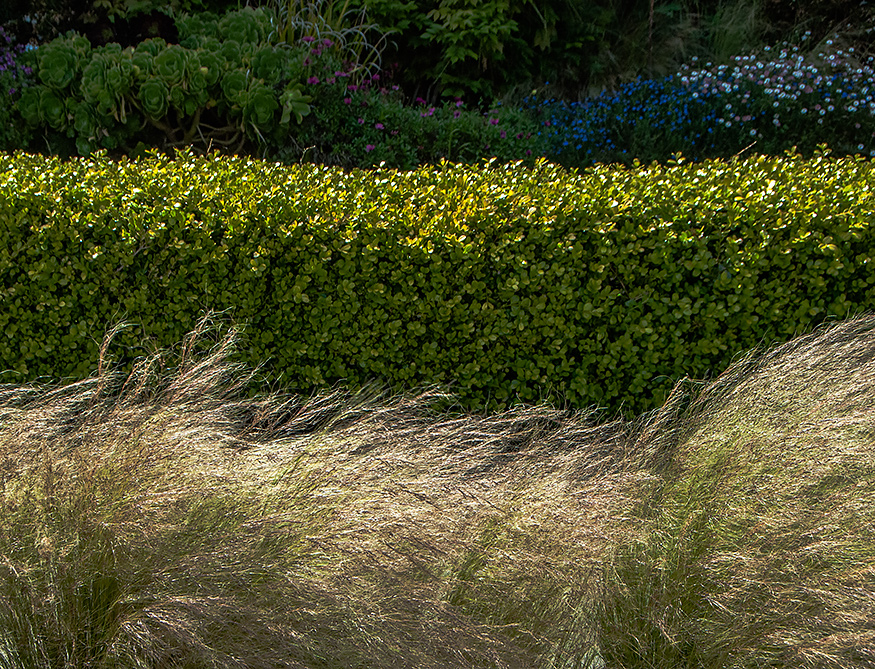
We really liked this shot, which we included in a recent slide show, the minute we took it. Well, the minute we saw it, anyway. So we took it.

Amber Waves. Nikon D200 with 18-200mm Nikkor at 35mm (52.5mm equivalent), f8, 1/350 second and ISO 200. Processed in Adobe Camera Raw. Hover your mouse or tap for an enlargement.
We had been attracted to the scene by the grasses bending in the wind but the boxwood hedge provided a perfect backdrop to the flowing grasses. And the darker flower bed beyond the hedge provided the magical third balcony to this theatrical setting.
So we had waves in two directions.
We had foreground, middle ground and background waves and we had the grasses blowing left to right.
But we also had a tonal wave running from the highlights of the grasses in the sunlight to the flowers in the shade.
All of these waves required more than a little editing, it turned out. The slide show image was, of course, processed with the edits the rest of those images relied on. But we wanted to refine the image a bit further.
Here's what we started out with. It's the JPEG thumbnail from the Raw capture:

Camera JPEG. What the camera captured.
The first issue was reducing the main elements to a more compact composition with a crop that took in the major plantings of the flower bed as well as a hefty helping of the grasses in the foreground. The crop also emphasize the detail in the image.
We couldn't use a 16:9 crop for that and even a 3:2 crop seemed too constricted. So we made used a custom aspect ratio. And we slightly rotated the image to level the hedge.
We didn't want as saturated image as Adobe Color rendered so we switched to Adobe Standard.
We had by default applied our usual Basic settings to the image for this camera and lens to sharpen things up a bit. But we had to take them a good deal further to deal with the tonalities.
When we let Auto set the Basic sliders, it gave us an image that as bright as noon, bringing up the shadows as if they were in sunlight. That nearly blew the highlights in the grasses. But it gave us something to think about.
We decreased Auto's extra exposure a quarter stop to restore the low key nature of the image. Then we added some Dehazing that always seems to improve contrast on our captures. The Highlights slider was nearly at 100 percent. We opened up the shadows a bit.
That was the limit Camera Raw could do on one pass but we wanted to go further. So we opened the image again in Camera Raw and moved the Highlights slider even darker to get more detail in the grasses. You can do that. It's perfectly legal.
We took one more pass as it, using the Curves tool to hold the Highlights and Shadows with anchor points and slightly darken the midtones so the grasses would stand out against the box hedges.
We stopped there but, like the grasses, we could have leaned a little more one way or the other (and back again) trying to refine the edit.