C O N T E N T S
•
•
Photo Corners headlinesarchivemikepasini.com
![]()
A S C R A P B O O K O F S O L U T I O N S F O R T H E P H O T O G R A P H E R
![]()
Enhancing the enjoyment of taking pictures with news that matters, features that entertain and images that delight. Published frequently.
Test Drive: Topaz Studio


25 July 2019
Topaz Labs has launched Topaz Studio, an image editor focused exclusively on creative post-processing. "It's designed specifically around the artisanal post-processing workflow of carefully crafting a single image to your vision," the company said.
Topaz Studio. Our final image after creative editing.
Topaz Studio eschews library management, design tools, batch editing and other common image editing tools. As the company puts it:
There's a lot of photo editors out there that help you manage your workflow and make minor contrast adjustments. Topaz Studio is not intended for that. If it doesn't contribute to the vision of creating singularly beautiful images through post-processing, then we're not including it.
Instead, Topaz Studio focuses on three objectives:
- Cutting Edge Filters. Rather than provide Exposure adjustments, Studio rethinks what common adjustments would look, providing noise reduction, contrast enhancement, detail and monochrome filters instead.
- Powerful Selection and Masking. Recognizing that rarely do you want to apply the same effect to all parts of your image, Studio considers masking and selective adjustments to be a core task. Several innovations make selective editing substantially easier and faster, the company said.
- Fully non-destructive layers. Mix and match filters and effects with different blending modes and opacity. Changes in Studio can be edited and adjusted after the fact with a fully non-destructive layer workflow.
TEST DRIVE
We downloaded the free trial to give Topaz Studio a spin.
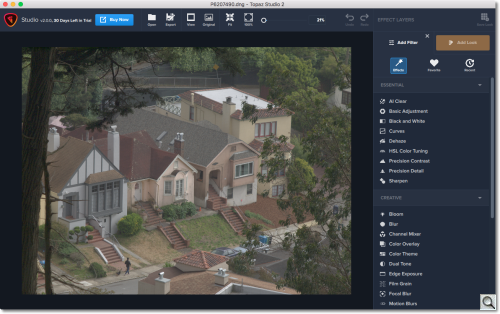
Topaz Studio. The interface showing the list of filters.
The installation takes 1.09-GB of disk space.
On launch, Studio presents a four-page tutorial that covers Opening an Image & Applying a Filter, Workflow and Looks, Saving a Look and Creating a Mask. Topaz Labs does an admirable job with its simple tutorials, keeping them brief without oversimplifying the subject.
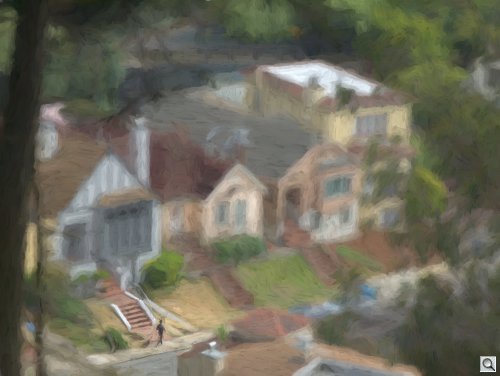
Our test image was taken with an Olympus E-PL1 using a Rexatar 25-50mm zoom on a Lensbaby Tilt Composer adapter. It suffered from a lack of contrast but we'd recently edited the image for a slide show and thought it would make a good test.
Test Image. No adjustments yet.
When we opened the DNG image converted from the ORF Raw capture in Topaz Studio, we clicked the
Add a Filterbutton to get started.You can zoom the image in or out with a two-finger gesture or use the buttons above the image panel to change magnification.
We were delighted to see
Dehazethere, so we started with that to improve the contrast of the long shot. Topaz Studio presents the filter at zero strength, so we tweaked the sliders looking for the right effect, which we found around .50.Interestingly, the filter has a popup button to change the blending mode. We left that at normal. It also provides a slider for suppressing artifacts, which we didn't need.
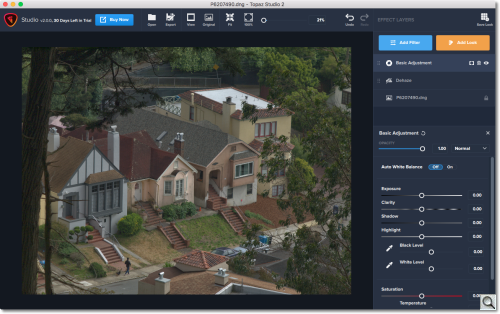
That left us with a dark image so we clicked on
Add Filteragain to selectBasic Adjustment. We could have started there but we find dehazing resets the starting line.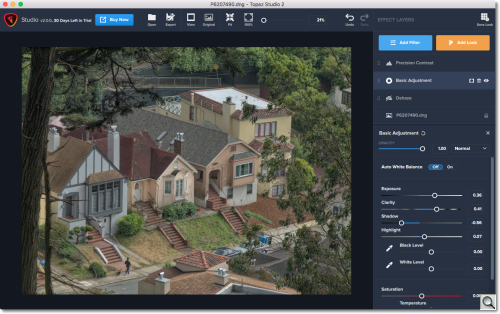
Basic Adjustment. All our old friends.
Adjustments aren't quite live. A blue progress bar (more of a line, really) runs across the top of the image pane when you move a slide, showing you when your edit takes effect.
We were glad to see a
Clarityadjustment among the other familiar tools.We were happy enough with those changes but we thought we'd explore a few more filters.
Precision Contrastintrigued us and when we added it to our image, we were even more intrigued. It includes settings for three kinds of contrast: Contrast, Lighting and Color with an overriding Opacity setting to control application.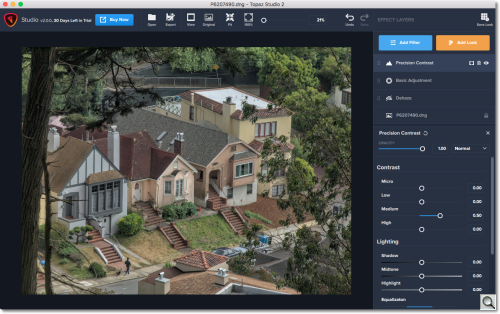
Precision Contrast. Lots of options.
Each of those settings has its own group of sliders and/or buttons, providing unique control over image contrast. But not much documentation.
Fiddling around, we learned what each does and applied the settings we wanted. By "fiddling around," we mean setting the sliders to their maximum positive and negative values to see what effect they could have.
We also wanted to try
Precision Detail.Three buttons determine what areas of the image it affects: Overall, Shadows or Highlights. The slider labels change when you select a different button.
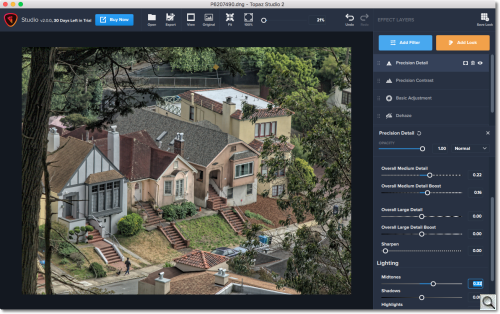
Precision Detail. We stuck to Medium Detail Overall.
There's also a Lighting section to make changes to the tonality of the image, which we used to brighten the image after sharpening it.
Working first with medium detail overall, we found we could blur over oversharpen to the point of an illustration with just the one slider. That's a nice range to work with.
A companion slider to the detail slider is a boost slider to tweak the effect.
All that was done with the Essential filters group. And we were able to turn our rather flat image into something we liked.
But could we do more with it? Enter the Creative and Stylistic filters groups.
The Creative group includes Bloom, Blur, Channel Mixer, Color Overlay, Color Theme, Dual Tone, Edge Exposure, Film Grain, Focal Blur, Motion Blurs, Quad Tone, Text and Vignette.
Your mouth is watering. But it is nice to see options ranging from the nerdy but irreplaceable Channel Mixer to the nostalgic Film Grain.
The Stylistic group includes Abstraction, AI ReMix, Digital Frame, Edges, Glow, Impression, Radiance, Smudge and Texture.
We gave Focal Blur a try, using the
Circular Blurbutton to focus attention on the pedestrian in our image. There's also aTilt & Shiftoption and both let you change where in the image the effect is located.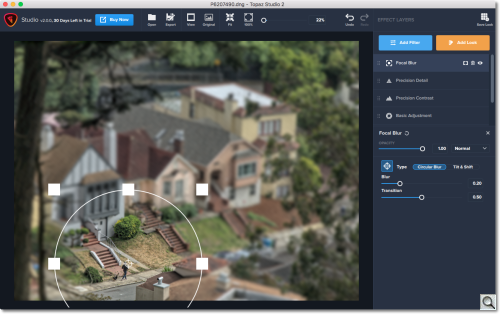
Creative Filter. We moved the Circular Blur target to our pedestrian.
Click on the target to change the location of the
Circular Blureffect. TheTilt & Shifteffect has its own position sliders.For a Stylist filter, we couldn't resist Impression, which converts the image into a painting. Options include the kind of brush stroke and its length, among other things. There's quite a variety of options, making it possible to turn your image into anything from a sketch to an oil painting.
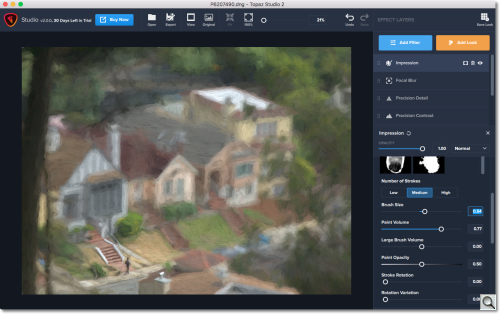
Stylist Filter. We applied Impression for a painterly effect.
We learned a bit more about filters as we used them. Here's a few pointers:
- You can revisit any applied filter just by clicking on its layer. You can also delete the filter from the stack.
- You can change the order of the filters by grabbing the icon on the far left.
- We could not reset a slider by double clicking on it.
Once you've done all that work, you just might want to save the stack of adjustments. That's what Looks are for.
Click on the Save Look button and a dialog box appears, prompting you for the Look Name and a Description.
There are quite a few Looks installed with the program, all nicely categorized that use any active image as their thumbnail.
And, of course, it wouldn't be any fun to do all that work without being able to export the results.
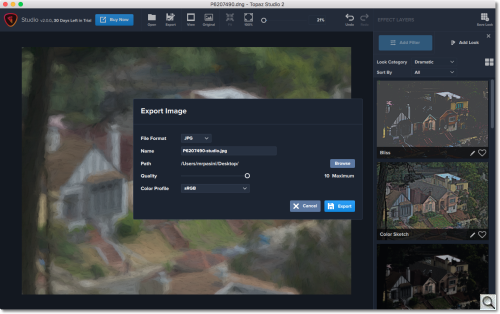
Export. Comprehensive options.
Topaz Studio provides an Export dialog with several options that depend on the format chosen:
- Format: JPEG, TIFF or PNG
- Name
- Path
- Quality/Compression/Bit Depth
- Color Profile: ProPhoto RGB, sRGB, Adobe RGB, Apple RGB, Wide-gamut RGB
Our brief test drive of Topaz Studio was a thrill. The bare bones description of it as a creative image editor rather than a tool to fix exposures belies its potential to transform your photographs into anything from optimized images to artwork.
Although we bumped into a few glitches along the way, we didn't run into any deal breakers as we kicked the tires. But we were impressed with the suite of filters and looks Topaz Labs has packed into this first release.
That wins it all four corners from us.
PRICE, AVAILABILITY
Topaz Studio is available now for a special introductory price of $79.99, $20 off the regular price, which expires in 15 days. A free 30-day trial is also available.
Topaz Labs Introduces Topaz Studio
A workflow devoted entirely to creative photo post-processing.
Topaz Studio 2 has only one purpose: creative photo editing. This starts after you select your image and ends when you export your finished work. It's designed specifically around the artisanal post-processing workflow of carefully crafting a single image to your vision.
Studio is the editor to use when you want jaw-dropping images and you're not afraid to spend the time to get them. It's for creating works that push the bounds of your artistic vision; the few that you know you'll look back upon in years as one of your best creations.
That's why you won't find library management, design tools, batch editing or other common image editor tools in Studio. There's a lot of photo editors out there that help you manage your workflow and make minor contrast adjustments. Topaz Studio is not intended for that. If it doesn't contribute to the vision of creating singularly beautiful images through post-processing, then we're not including it.
Instead, Topaz Studio 2 focuses on doing three things well. We consider these the product's guiding design principles and firmly believe that they will make your creative workflow both easier and faster:
1. Cutting edge filters.
Most image editor tools are the same: your Exposure in one editor is the same Exposure in another. In Studio, we've thought about what common adjustments would look like if they were designed today and updated them to their most modern and useful forms.
2. Powerful selection and masking.
Very rarely do you want to apply the same effect to all parts of your image the same. Studio considers masking and selective adjustments to be a core task and features several innovations that make selective editing substantially easier and faster for you.
3. Fully non-destructive layers.
Mix and match filters and effects with different blending modes and opacity. Everything that you do in Studio can be edited and adjusted after the fact with a fully non-destructive layer workflow.
We believe these are the key ingredients that will help you create the best images possible.
Topaz Studio is available now for a special introductory price of $79.99, $20 off the regular price. A free trial is also available.