This is the third in a series of five product reviews of Datacolor's color management tools, which the company has this year combined into two kits. SpyderCHECKR is part of the Capture Pro kit but can also be purchased separately.
Any color digital capture has two challenges. The first is correcting for lighting conditions, which vary with each source from sunlight to fluorescent lamps. The second is the color capture limitations of the camera's sensor itself.
The first issue, which can result in a noticeable color cast, can be corrected in post processing using the White Balance tool to identify a neutral hue in the image. That can be black, gray or white.
But the second issue will persist. One of the most notorious problems sensors have exhibited is capturing the red spectrum, which often appears significantly oversaturated.
SpyderCHECKR provides a color target with 48 swatches, including various shades of gray and skintones, and software to compare the captured values to the recorded values to create a profile for any particular lighting situation that you can use in your image editing software.
Lighting conditions affect color reproduction. But without knowing the precise hue of a color swatch, you can't correctly adjust the color rendering of your capture. In addition, sensor don't capture every hue accurately.
Solution
SpyderCHECKR provides a color target with 48 swatches, including various shades of gray and skintones, and software to compare the captured values to the recorded values to create a profile for any particular lighting situation that you can use in your image editing software.
There is a $49 SpyderCHECKR24 alternative featuring the 24 most common spectrally engineered color patches in a portable vinyl sleeve. This review, however, is of the 48-patch model in a rigid portable case with a tripod mount.
And while Datacolor provides instructions for using the product with Adobe Camera Raw, Lightroom and Hasselblad's Phocus, we'll focus on creating profiles for use with Adobe Camera Raw. The instructions for the other products are in the Help documentation embedded in the SpyderCHECKR application itself, which can be downloaded for free.
SpyderCHECKR provides a color target with 24 or 48 swatches, including various shades of gray and skintones, and software to compare the captured values to the recorded values to create a profile for any particular lighting situation that you can use in your image editing software.
The profile corrects any color cast generated by the light source and moderates the personality of a particular sensor's color capture accuracy.
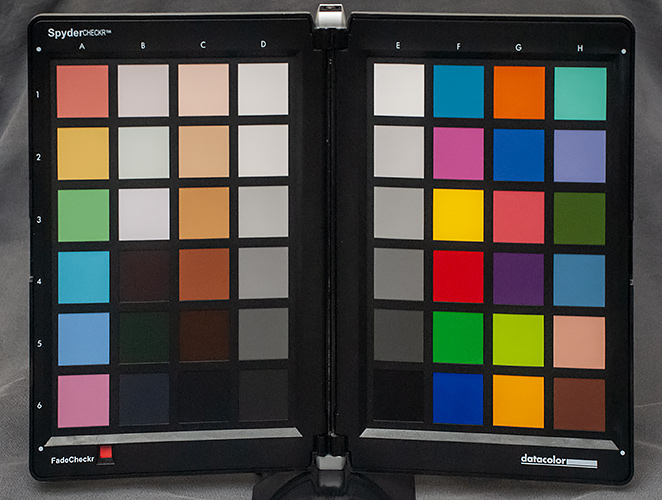
The plastic case opens up to a 12 x 9-inch chart that includes two paper charts with 24 color patches each that sit inside a frame on each side of the case.
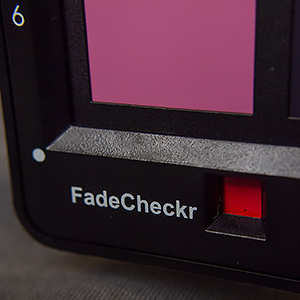
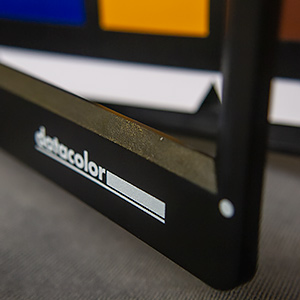
In addition to the color patches there is a FadeCheckr patch in the bottom left corner to indicate when the color patches have faded too much to create useful profiles from the measured data.
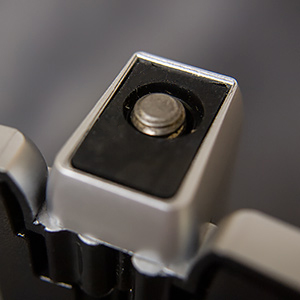
There is a tripod socket at the bottom of the spine and a screw at the top retracted by a spring.
The current version of the software is 1.3. You can skip the CD and download it from the Web site but you'll need the serial number on the CD to activate the software.
There was nothing at all to do apart from installing the software. Just remember to bring the SpyderCHECKR along with your camera.
SpyderCHECKR. The 48-patch version.
Once you're at the scene, open the SpyderCHECKR all the way and angle it about 45 degrees to the light source to avoid shadows. Then place it where your subject is or will be. It isn't necessary to zoom in on the chart to fill the frame.
The next trick is simply to capture an image in the working light with your camera. That's it.
Of course, that's two tricks.
First, you want to make sure it's the camera you'll be using for the shoot.
And second, you want to shoot in the same light you'll be using too. So if you aren't using flash, don't shoot the SpyderCHECKR with flash. And if you're using monoblocs, fire them up.
You don't actually have to use the SpyderCHECKR software but it's a quick one-step way to create a profile you can use in your image editing software.
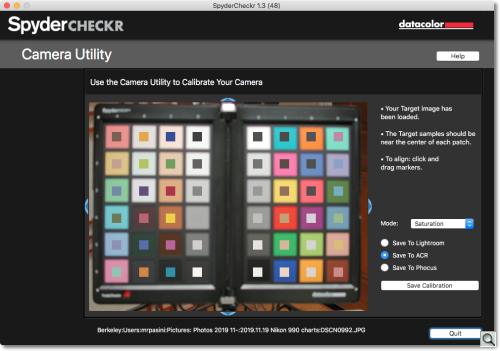
SpyderCHECKR Software. Drag the target image onto the window and align the squares then pick a mode and click the button to create a profile.
In our case, we simply dragged the image onto the landing area in the software's window and used the arrows to scale it to the software's sample points. You can't rotate the chart in the application, so if it's askew you should fix that in your image editor first.
SpyderCHECKR offers three modes for creating the profile:
Colorimetric provides the most literal results for reproducing artwork or product colors.
Saturation provides the generally most pleasing results for a variety of images.
Portrait reduces the color saturation of skin tones to facilitate portrait processing.
Datacolor notes the effects of these modes are subtle, and may not be noticeable on some images. We generally used Saturation unless we had a specific job requirement.
Then pick a destination application and click the Save Calibration button. Give the profile a name that reflects both the camera and the lighting to create a profile for your camera under those lighting conditions.
Use that profile in your image editing software as a preset. Your image will instantly be transformed with more accurate color.
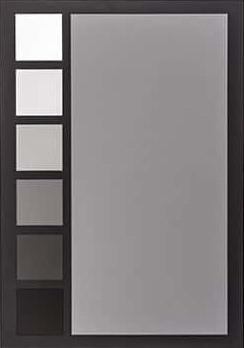
You can use any of the gray squares to set white balance with any editor's White Balance tool.
As the Datacolor video reveals, the second panel's white square is 94 percent white and the black square is 4 percent black. You can use these to set White and Black points, referencing the histogram as you do.
You can adjust rotation and exposure of the chart image in your image editing software before creating the profile in the SpyderCHECKR software.
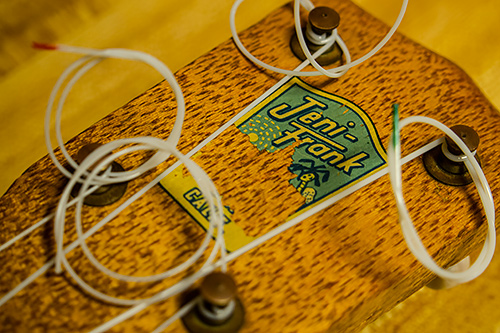
The first was new LED lighting we installed in our shop. They're warm but how warm, we wondered? When we shot our series documenting a ukulele repair, we noticed our camera was recording the scene very warm and with greater saturation.
This is a pretty typical case for the SpyderCHECKR.
In the SpyderCHECKR software, we created a profile using the Colorimetric option for fidelity to the scene. The profile was automatically loaded into Adobe Camera Raw by the software.
We made just some basic edits in Camera Raw to the original Raw file. We enhanced Clarity and increased the Exposure, two things the profile wouldn't touch.
The second image has the profile applied. You'll notice the background brighten but also notice the subtle hange in the color cast of the ukulele strings.
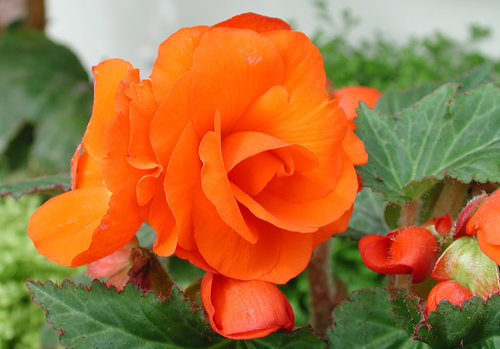
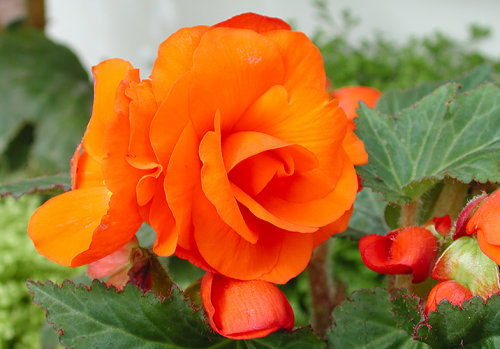
The second situation we're calling forensic lighting. We had a 2003 image shot in the diffused light of the Conservatory of Flowers in Golden Gate Park with a Nikon 990. The particular shot that concerned us was of an orange flower in which the Nikon simply couldn't cope with the brilliant color.
While we couldn't go back in time, we could simulate the shooting situation by taking a photo of the SpyderCHECKR with the Nikon 990 in the diffused light provided by a central skylight that, like the Conservatory, was fogged white.
After capture, we created a profile just as we had before in the SpyderCHECKR software. Then we opened the image and applied the profile to it and instantly saw the improvement in the orange hues.
Unlike a global color cast correction like that the SpyderCUBE can make, this correction affects only the flower in this image. As you click between the two images note the difference in the orange flower and then note how the green leaves are unaffected.
The SpyderCHECKR profile protects the greens while shifting the reds to achieve the improvement.
SpyderCHECKR can perform a few other tricks as well.
Gray Target. On the back of each SpyderCHECKR target sheet there are neutral target patches. The patches show the same gray ramp on the color side of the target with an enlarged 50 percent gray patch.
Checking your Display's Neutrality. You can use the SpyderCHECKR Gray Target to check the neutrality of your monitor. Place the SpyderCHECKR, with the Gray Target visible, against a neutral background under a medium color temperature, high CRI proofing light or in a proofing box, visible at the same time as your monitor. Dim ambient lighting, avoid backlight and avoid colored objects in the scene. As your eye adapts to the gray balance of the SpyderCHECKR, shift your gaze to a totally neutral image on a totally neutral background on your display like the Black and White images in the Datacolor SpyderProof Matrix image. Shift your gaze back and forth carefully between the SpyderCHECKR and the screen to see if the screen appears to have a different color tone from the neutrals in the SpyderCHECKR.
In-Camera Gray Balancing. Shoot the Gray Target of the SpyderCHECKR in your camera's White Balance or Gray Balance mode to produce an in-camera color balance or custom white balance for the lighting conditions in which you've shot the SpyderCHECKR.
FadeCheckr. The FadeCheckr patch the 48 patch SpyderCHECKR indicates how much light the SpyderCHECKR target has been exposed to and reminds you to keep the target closed when not in use. It will fade from red to yellow after the equivalent of 30 days of full sun in the U.S. Southwestern desert, which would be time to the SpyderCHECKR target sheets for $69. Alternately you can remeasure the target patches with SpyderPRINT.
We have a collection of color charts extensive enough to use as placemats during the holidays. And after a couple of years, that's all they're really good for. The patches fade and become misleading rather than helpful.
What sets SpyderCHECKR apart from the other color charts is the SpyderCHECKR software that, in a click, creates a profile you can use in your image editing software as a starting point for correcting color. You may want to take the color in a different direction but at least you'll know where north is.
And with the SpyderPRINT, you can even squeeze a little more life out of the SpyderCHECKR charts before you really have to replace them.


